inside: Learn how to start and make a crochet chain with written, photo, and video tutorials. Plus learn the crochet chart symbol. However you learn, Crochet Foundry has you covered.
The crochet chain is often the first stitch needed in a crochet pattern, and is in almost every patter. Luckily, it’s super easy. We’re going to walk through getting that first loop on your hook and making your crochet chain.
Table of contents
Terms to know
As you read and watch these tutorials, there will be some commonly used terms and phrases you’ll need to understand. Here’s an explanation of those used in our chain stitch tutorials.
When you crochet you hold the hook in front of you. Pattern and stitch instructions will often refer to the front or back of your hook or your work. In both cases, the front is the side facing you, and the back is the side facing away from you. So when you put the yarn in front of your hook or work, it’s in between you and the hook or work, and when you put the yarn behind your hook or work, it’s on the opposite side of the hook or work as you are.
NOTE: Front and back of work are different terms then right and wrong side of work. The front of your work is relative to how you are holding it, so it will not always be the right side of your work. The back of your work is also relative to how you are holding it, so it will not always be the wrong side of your work.
The tail of the yarn refers to the cut end, while the end still attached to the skein is often referred to as the working yarn or live end.
Abbreviations
ch: chain
yo: yarn over
Photo Tutorial
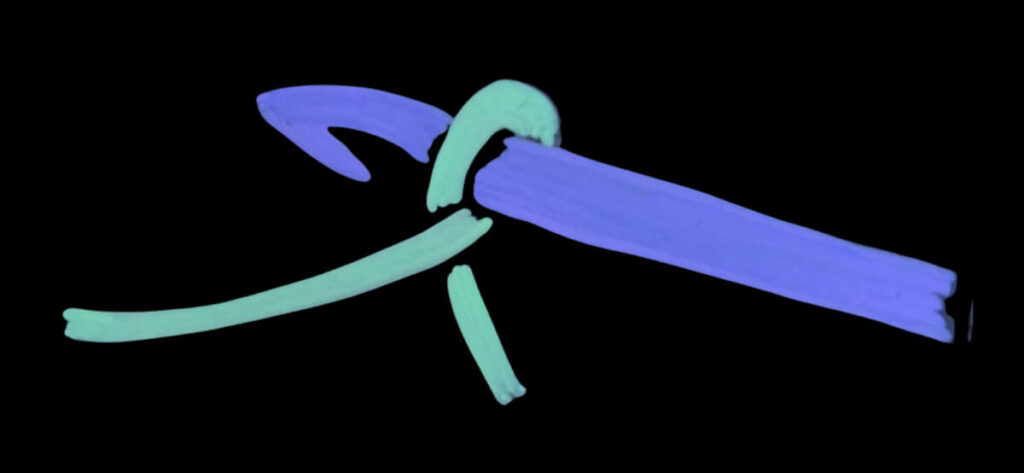
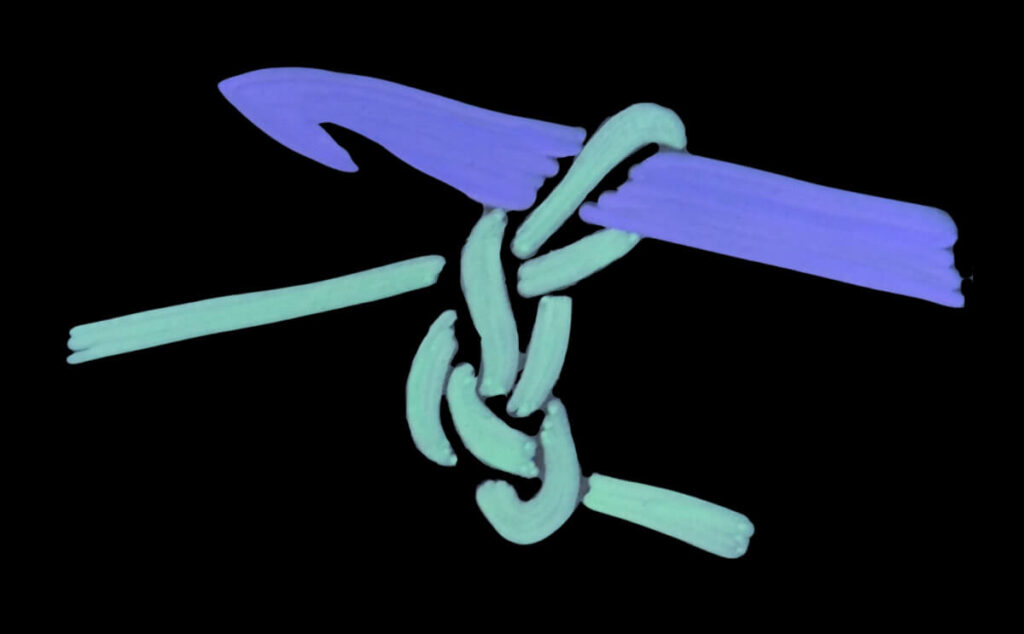
The first loop can be made by making a chain on the hook and pulling it tight to turn it into a slip knot:
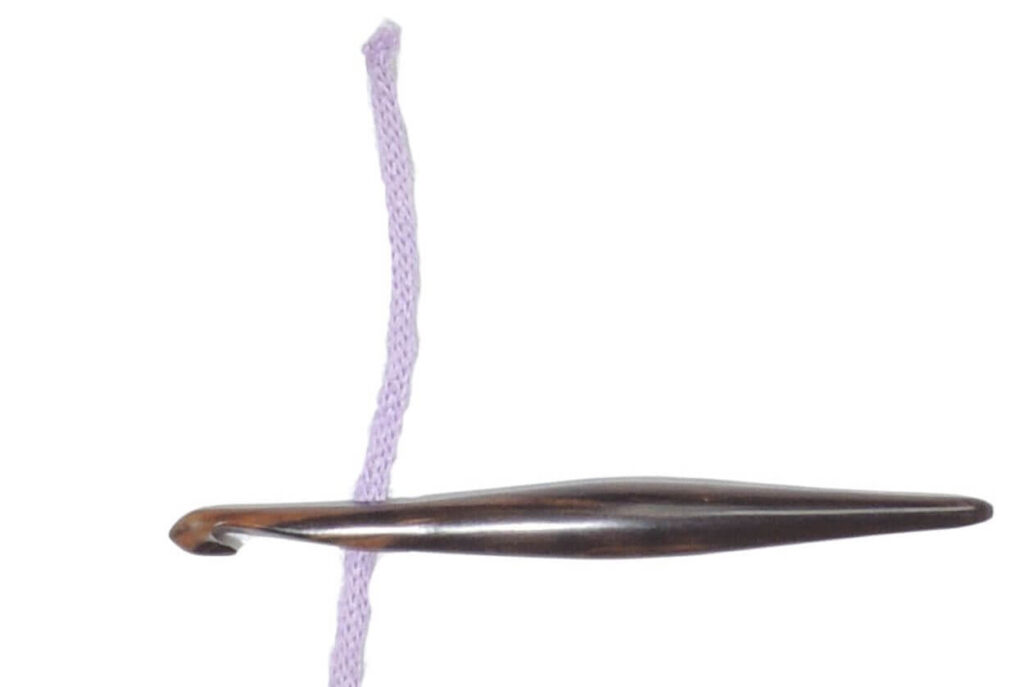
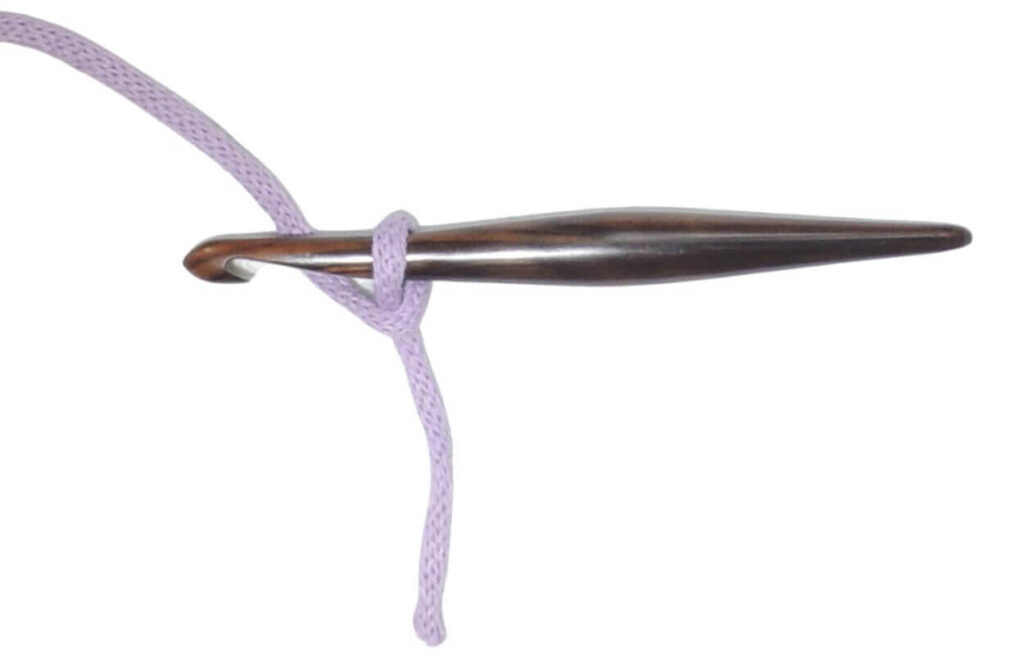
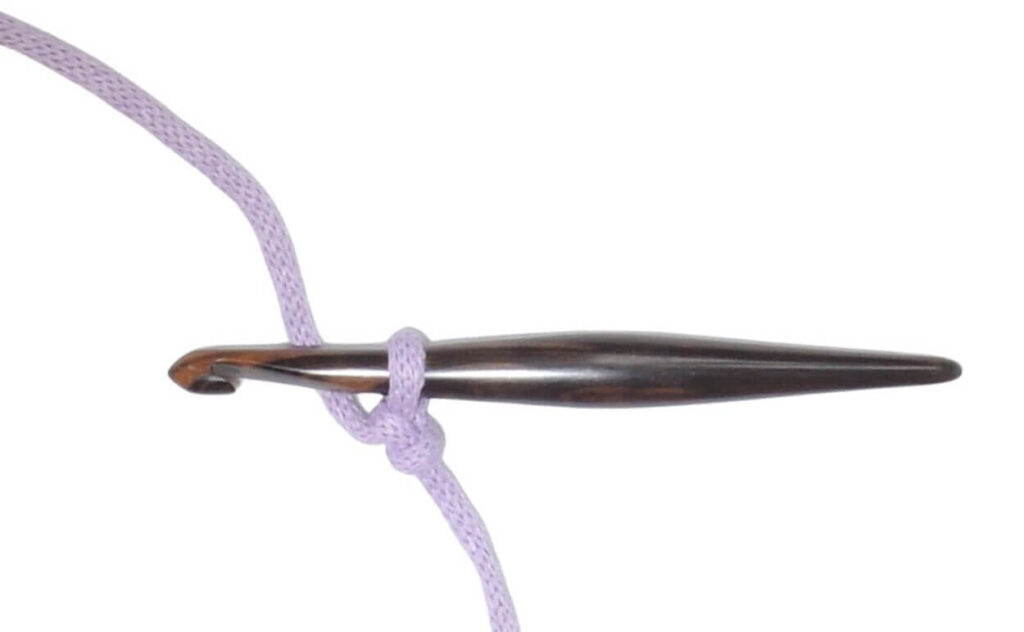
Place yarn behind hook.
Wrap tail of yarn over top of hook and back down in front of hook.
Pull yarn tail towards back, making a loop over the hook.
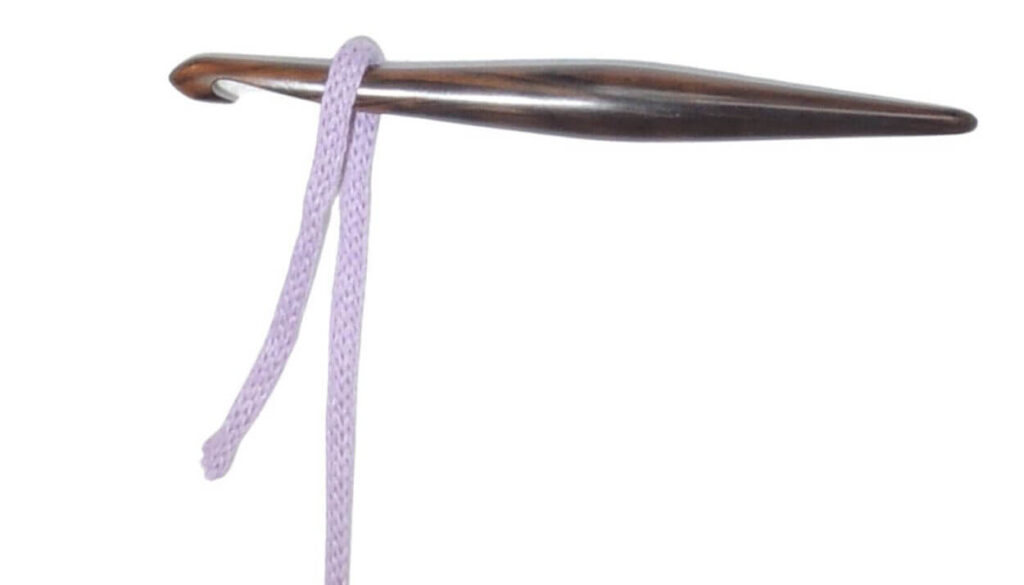
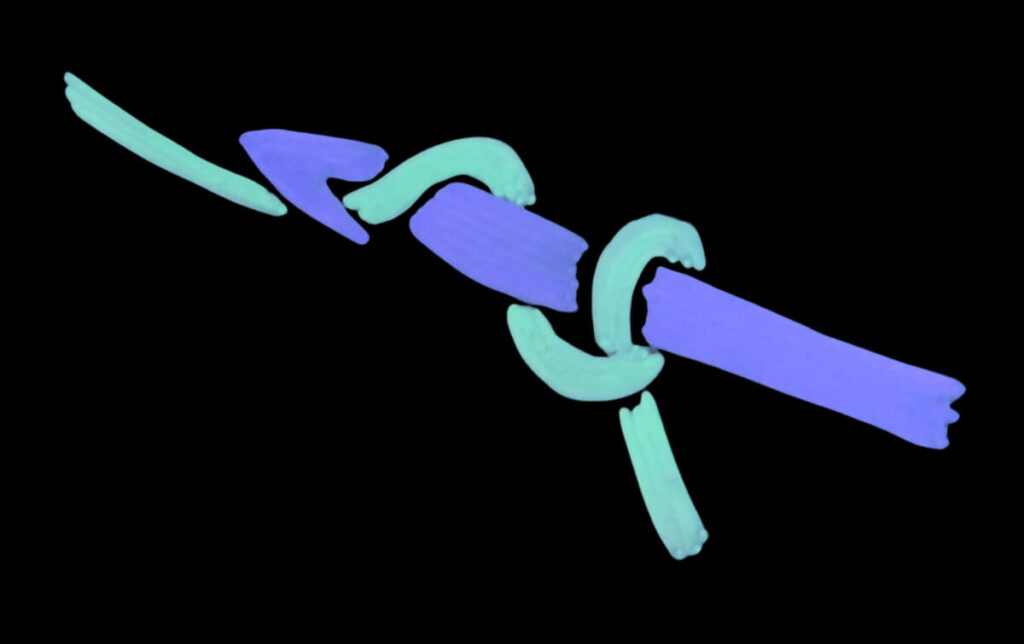
From this point on, it helps to pinch just under the loop on the hook with the same hand that you use to hold your hook. This keeps your work from spinning around the hook when you make a yarn over, as we are about to do.
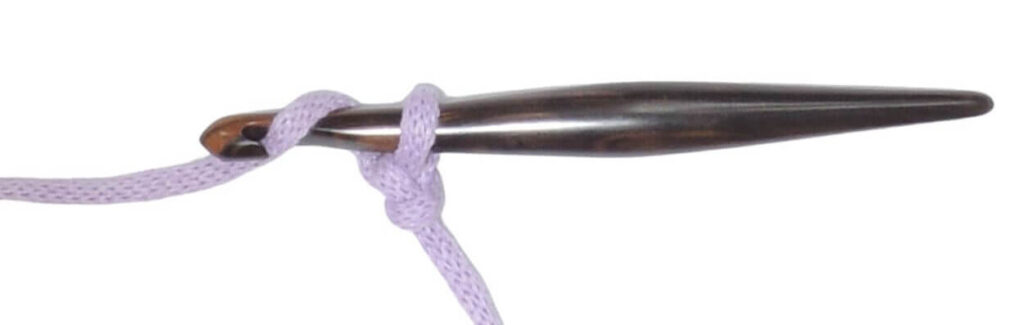
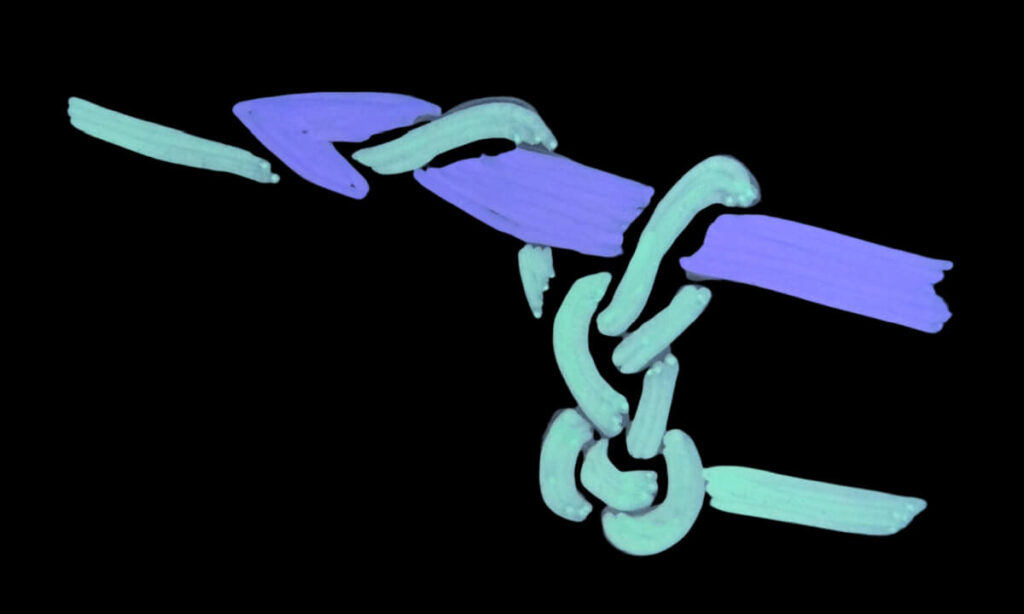
Wrap working yarn behind…
…and over top of hook, then to the back again, catching the yarn in the hook. This is a yarn over.
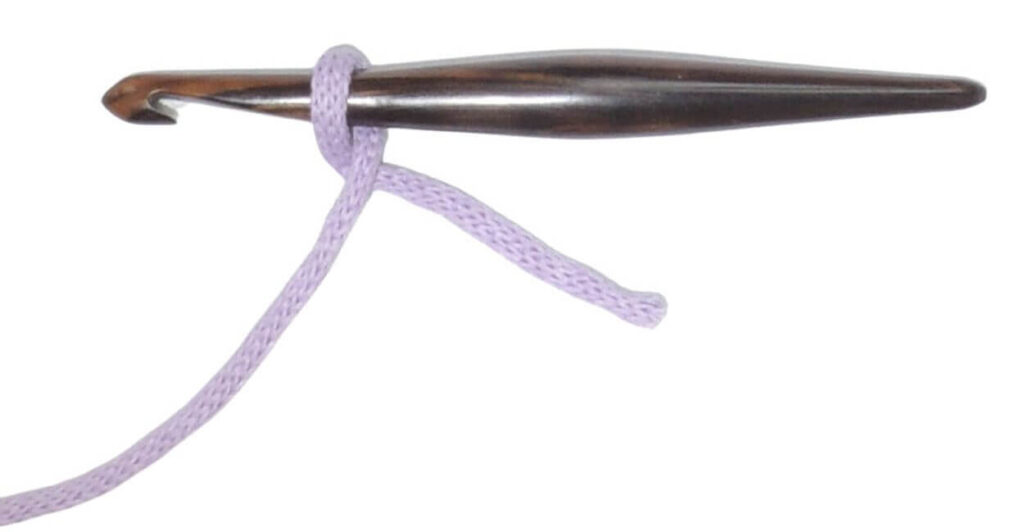
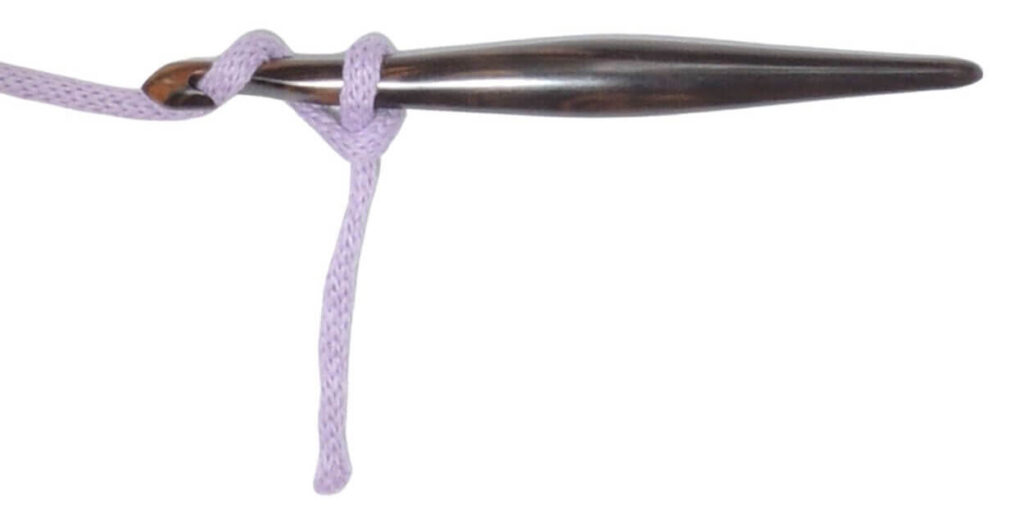
Pull yarn over through loop.
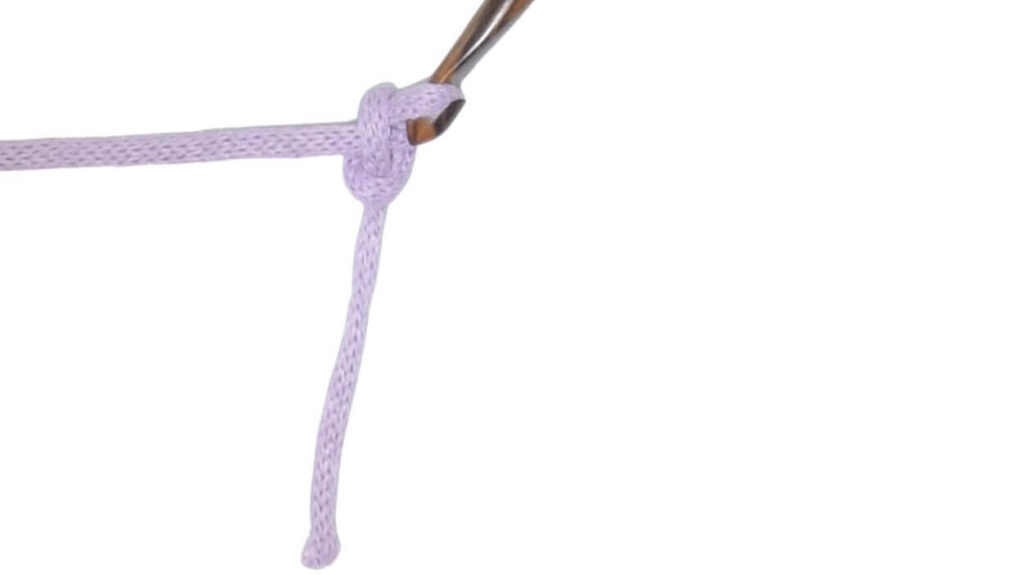
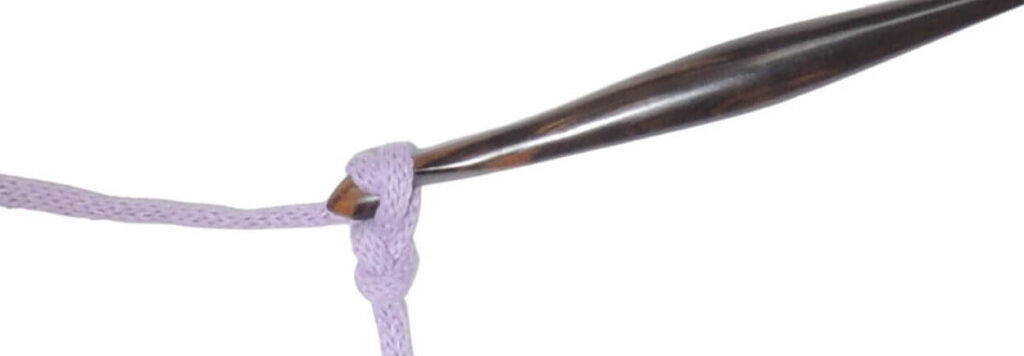
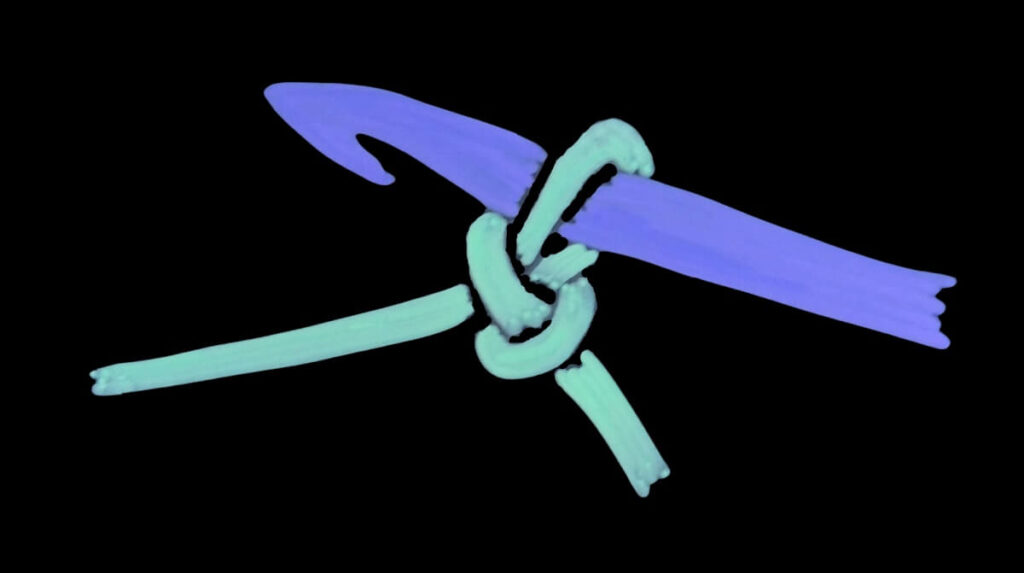
Pull yarn tail to tighten slip knot just made.
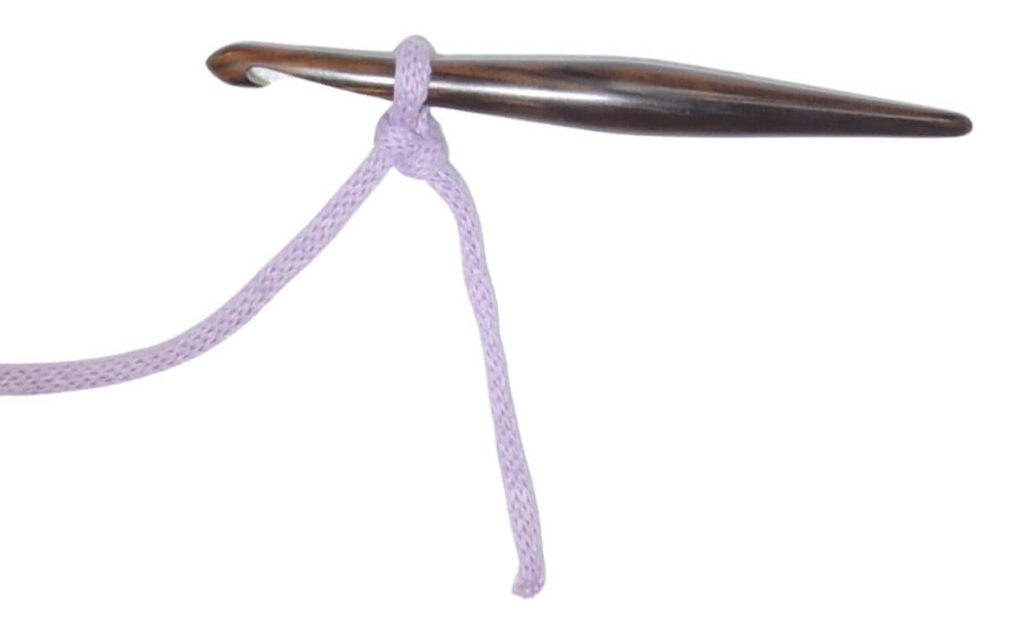
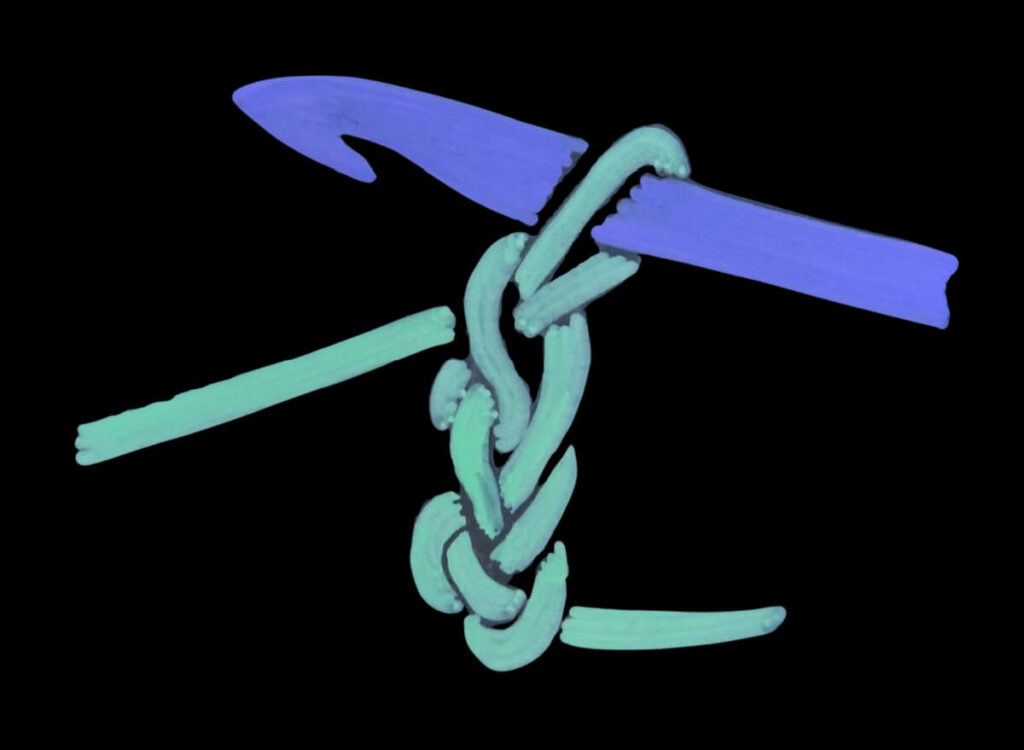
Now lets make a chain – it’s basically the same thing!
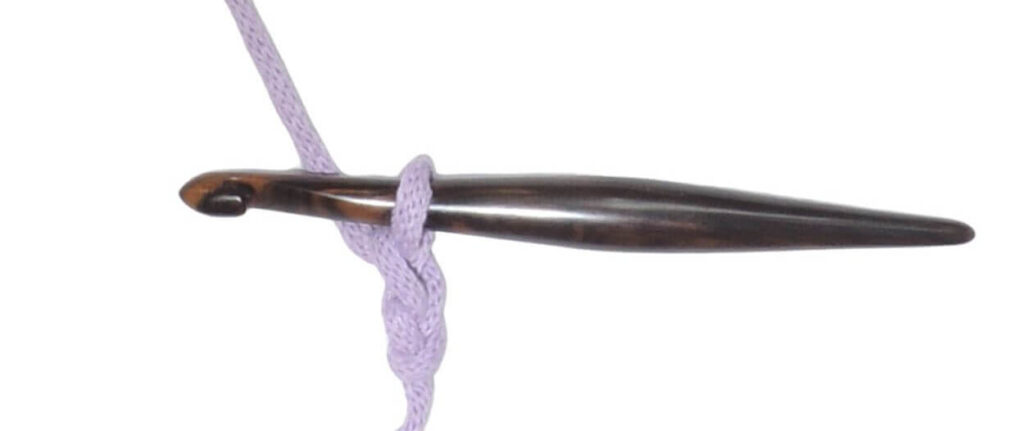
Now make another yarn over, wrap yarn behind…
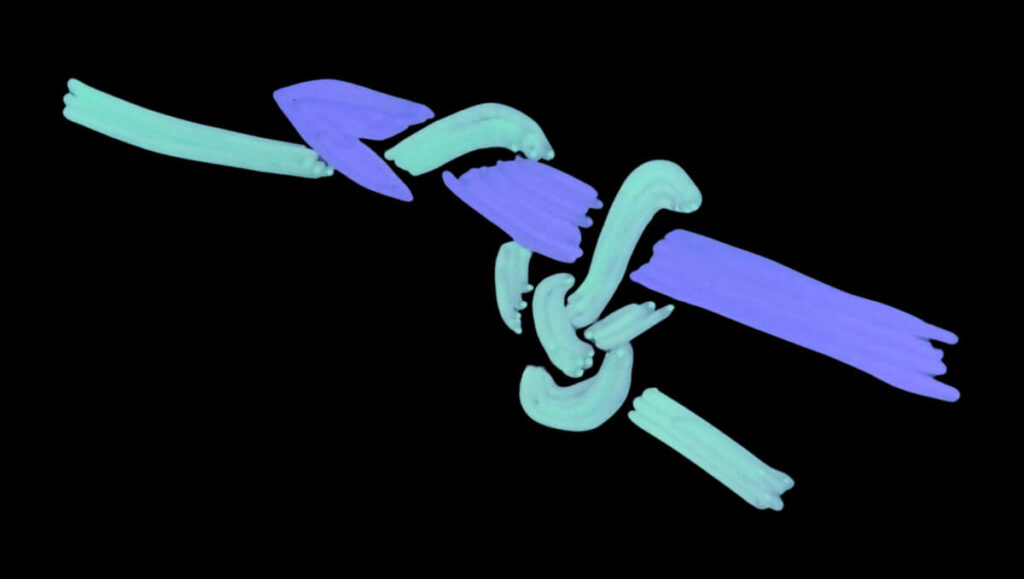
…over top, and back around hook, catching the yarn in the hook.
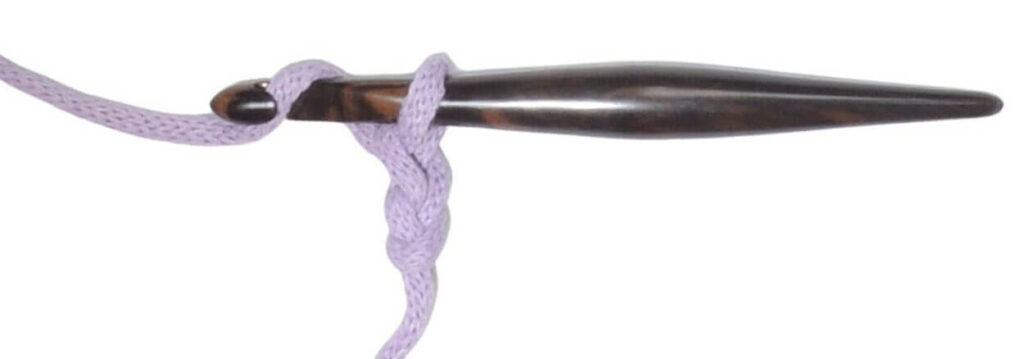
Pull yarn over through loop.
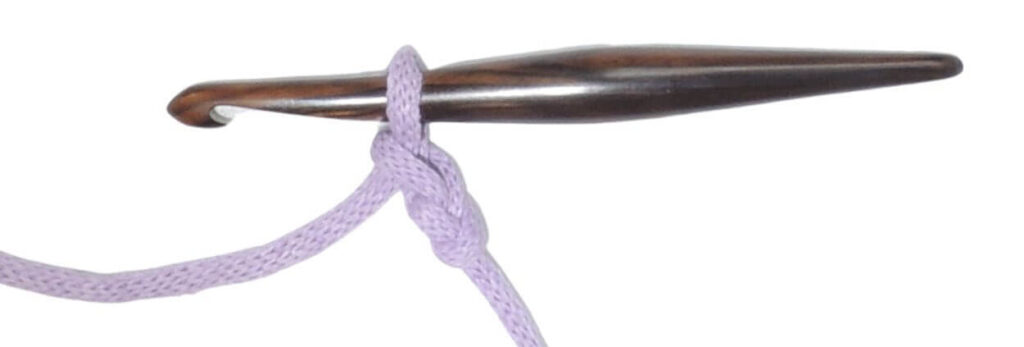
Ta-da! It’s a chain! Let’s make another.
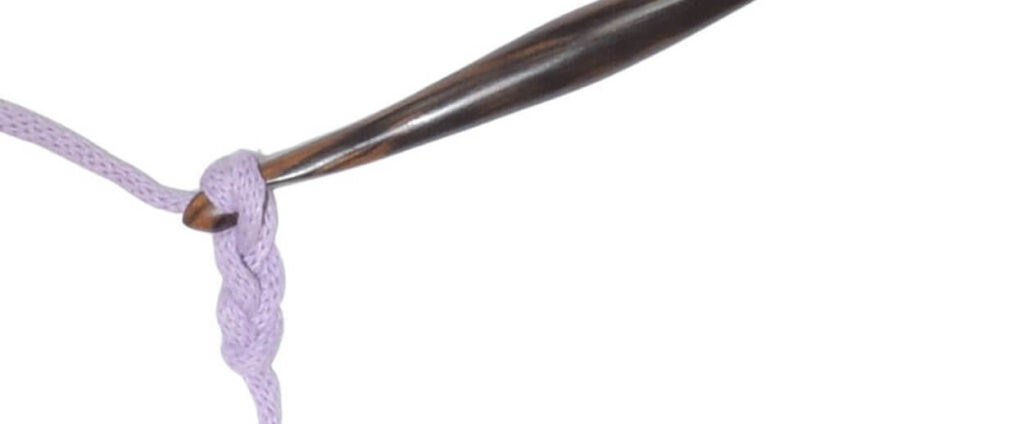
Yarn over again
Catch the yarn over in the hook.
Pull the yarn over through the loop.
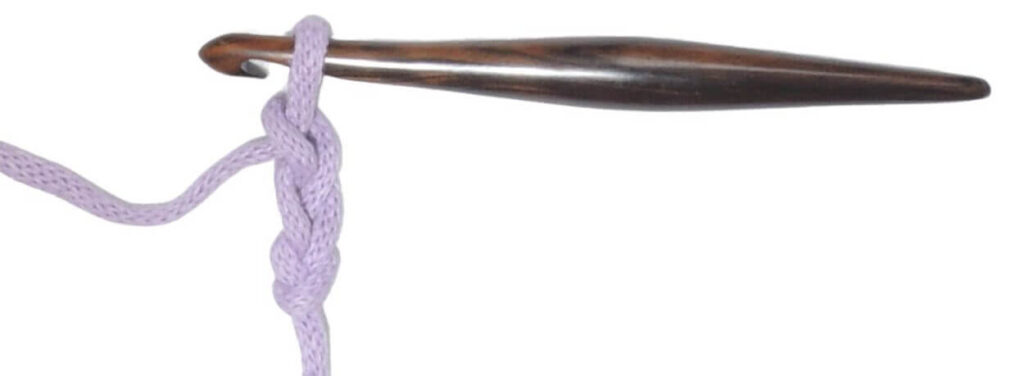
Another chain done!
Quick Instruction With Illustrations
Slip Knot: Place yarn behind hook, wrap tail over top of hook and to the front, then back under and to the back, pinch cross over beneath hook, yo, pull through, pull tail to tighten.
Chain (ch): Yo, pull through loop.
Anatomy of a Crochet Chain
As you read patterns, you’ll find that crochet chains have 3 types of loops. Here they are.
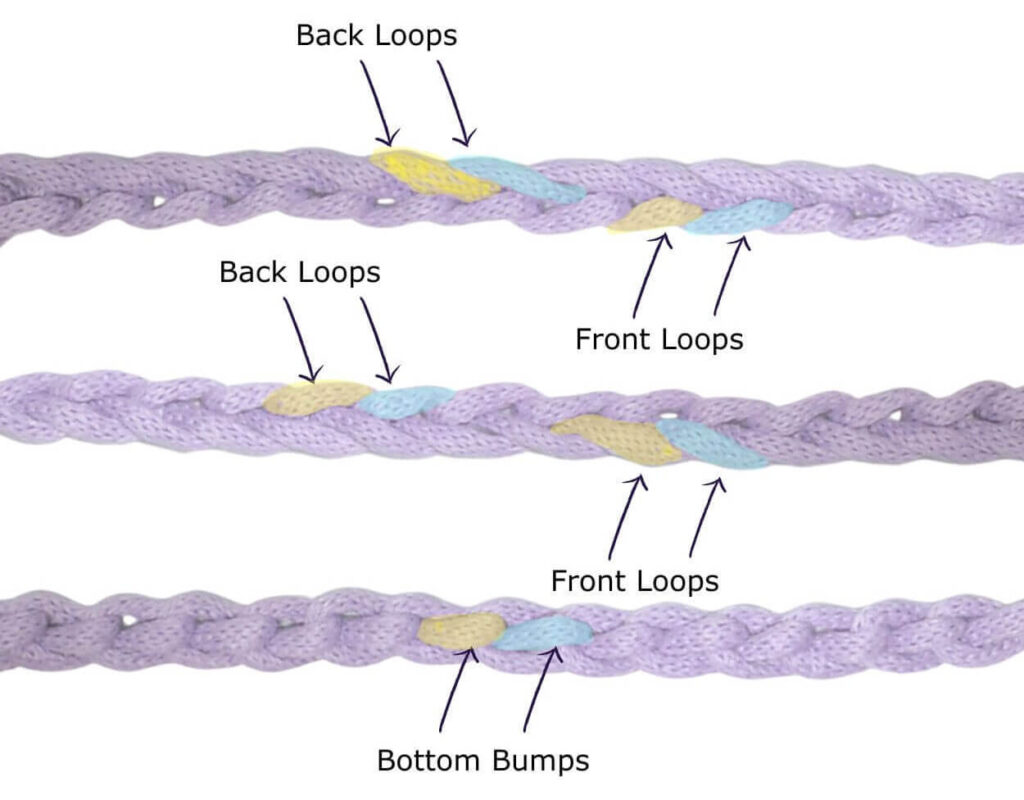
The back loop is the loop on the flat part of the chain that is farthest from you. This means which of the two loops on top is the back loop is relative to YOU.
The front loops is the loop on the flat part of the chain that is closest to you, again, this makes the front loop relative to you.
The bottom bump (sometimes called the bottom loop) is the bumpy loop on the bottom of the chain, underneath the flat part.
Chart
This is the crochet chart symbol for a chain stitch.

Video Tutorials
Crochet Chain Right Handed
Crochet Chain Left Handed