Beads and crochet go together like peanut butter and chocolate! Beads can be anything from a small accent to pretty much all you see. So, let’s look at a few ways to add beads into your crochet.
Crochet Foundry Members can find this tutorial with ad-free videos HERE.
This tutorial was originally published in the December 2024 Digital Edition of Crochet Foundry Magazine.
Adding Beads as You Go
Adding beads as you go is great for when you don’t want to go through the hassle of pre-stringing beads, when your yarn is too delicate to handle pre-stringing, or when you just want to toss in a bead here and there.
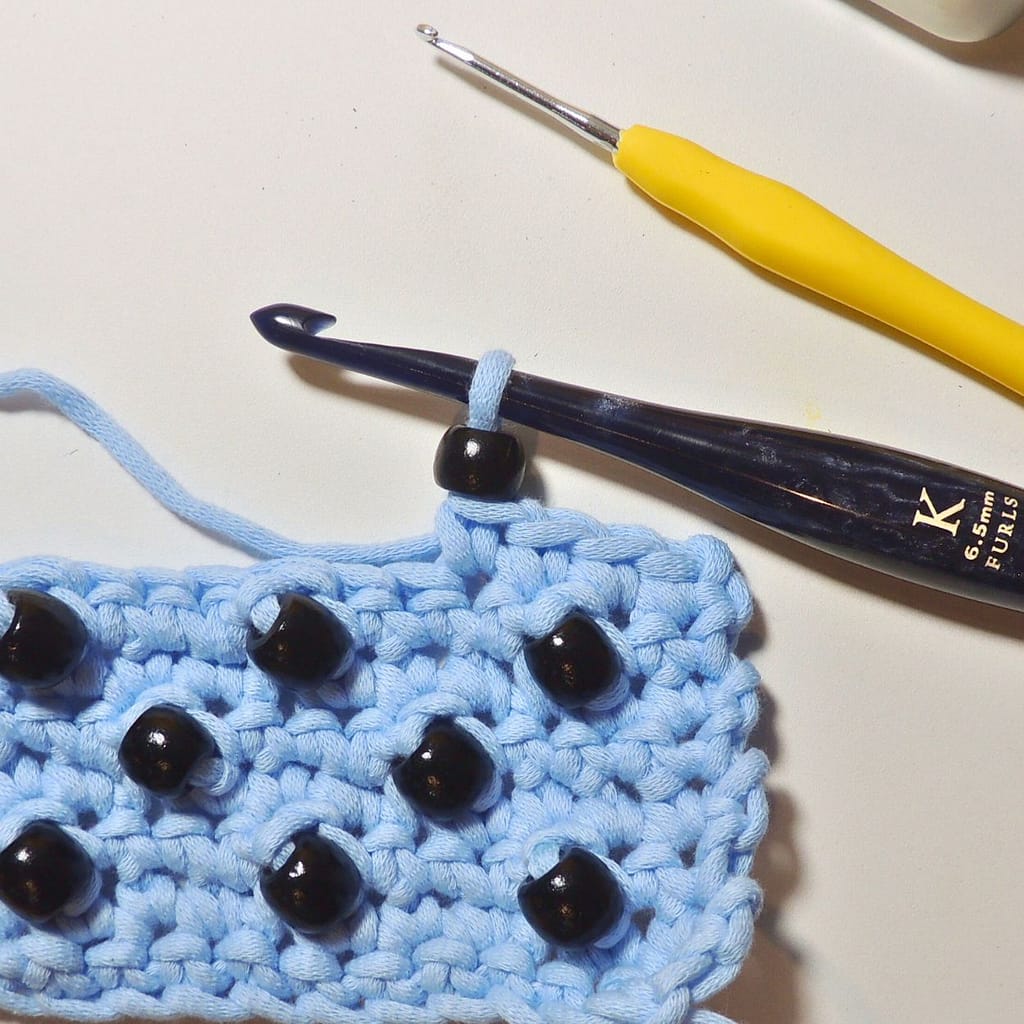
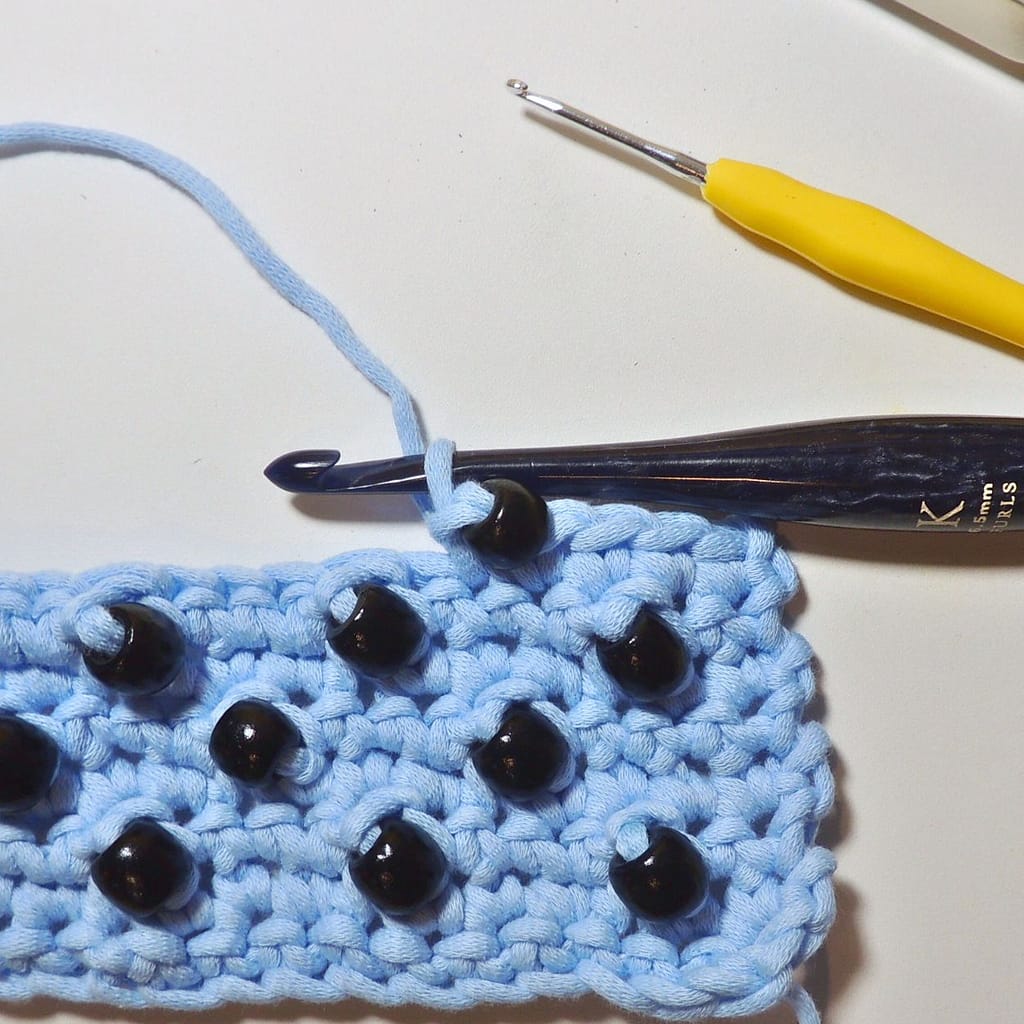
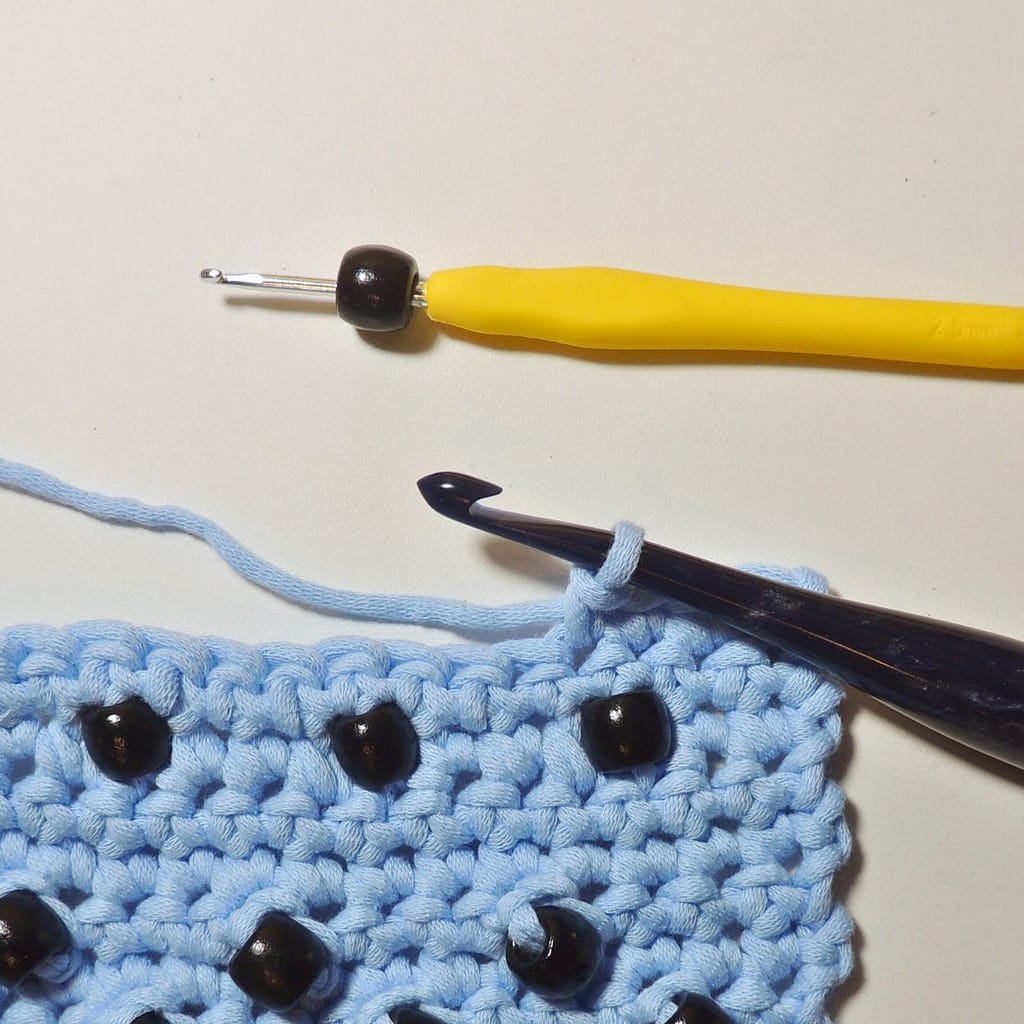
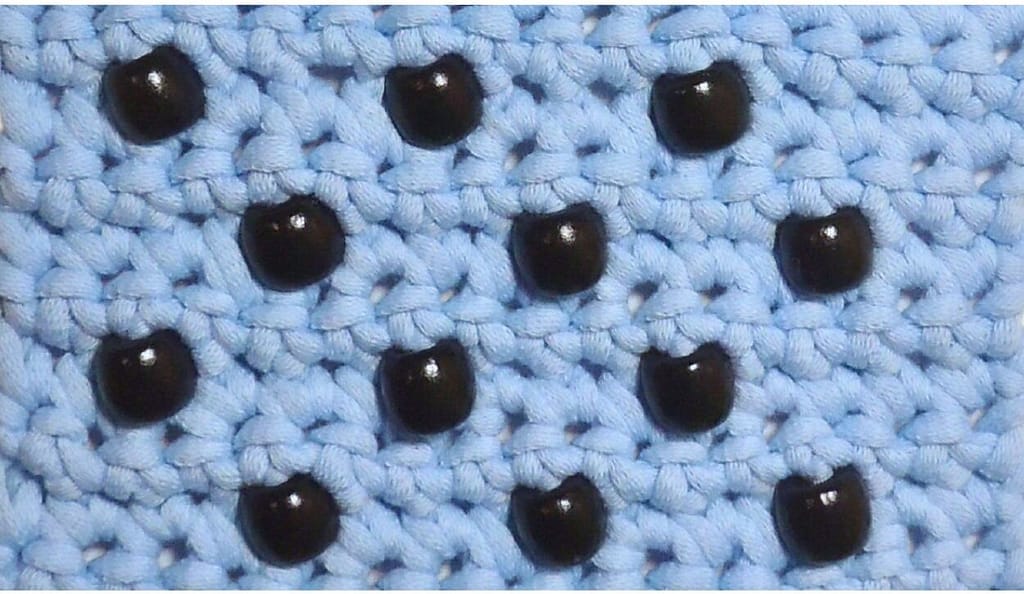
Adding Beads as You Go – Top of Stitch
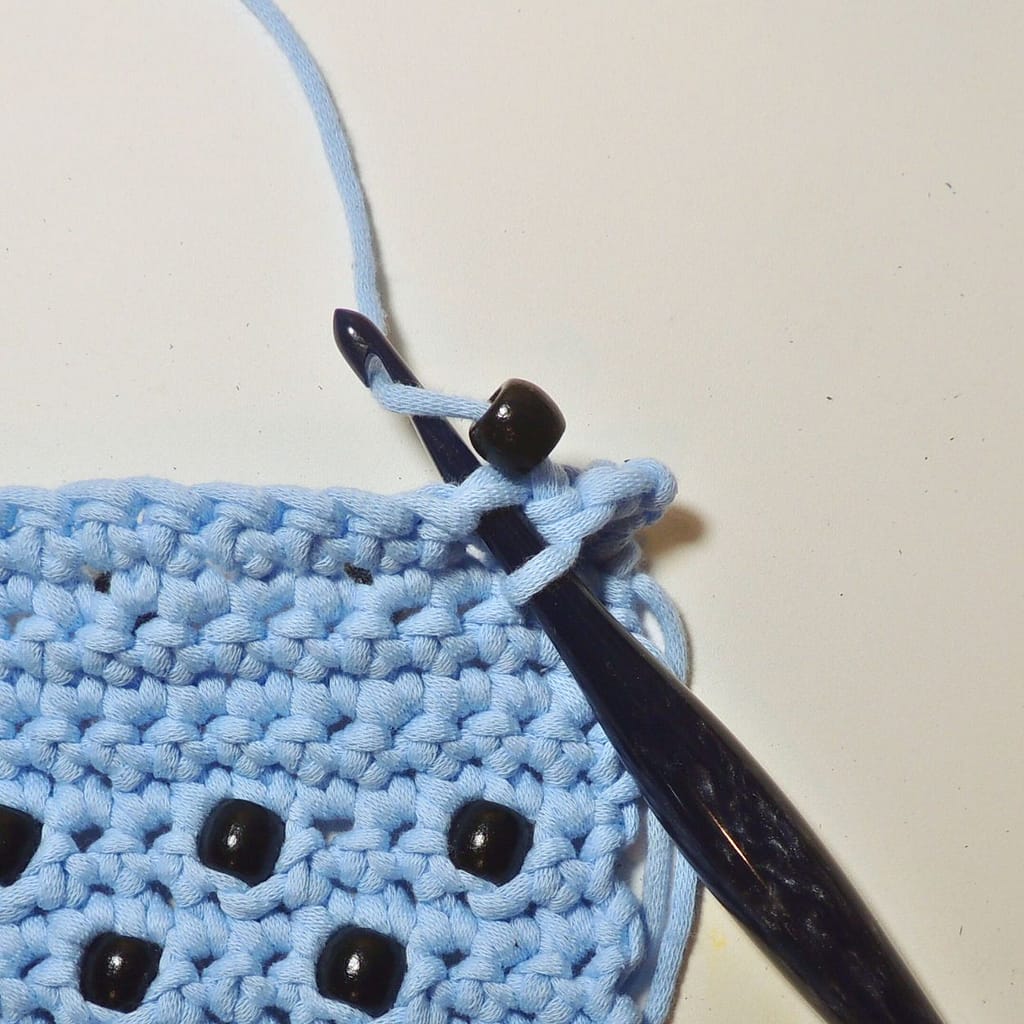
This method is usually done before beginning a stitch. The bead is added over the active loop on the hook in the following manner:
- When you get to the spot where you want to add a bead, remove the hook from the active loop.
- Pick up a bead with a smaller hook – one that will fit through the hole of the bead with a little extra room – and slide the bead to the hook neck.
- Grab the active loop with the smaller hook and slide the bead onto the loop.
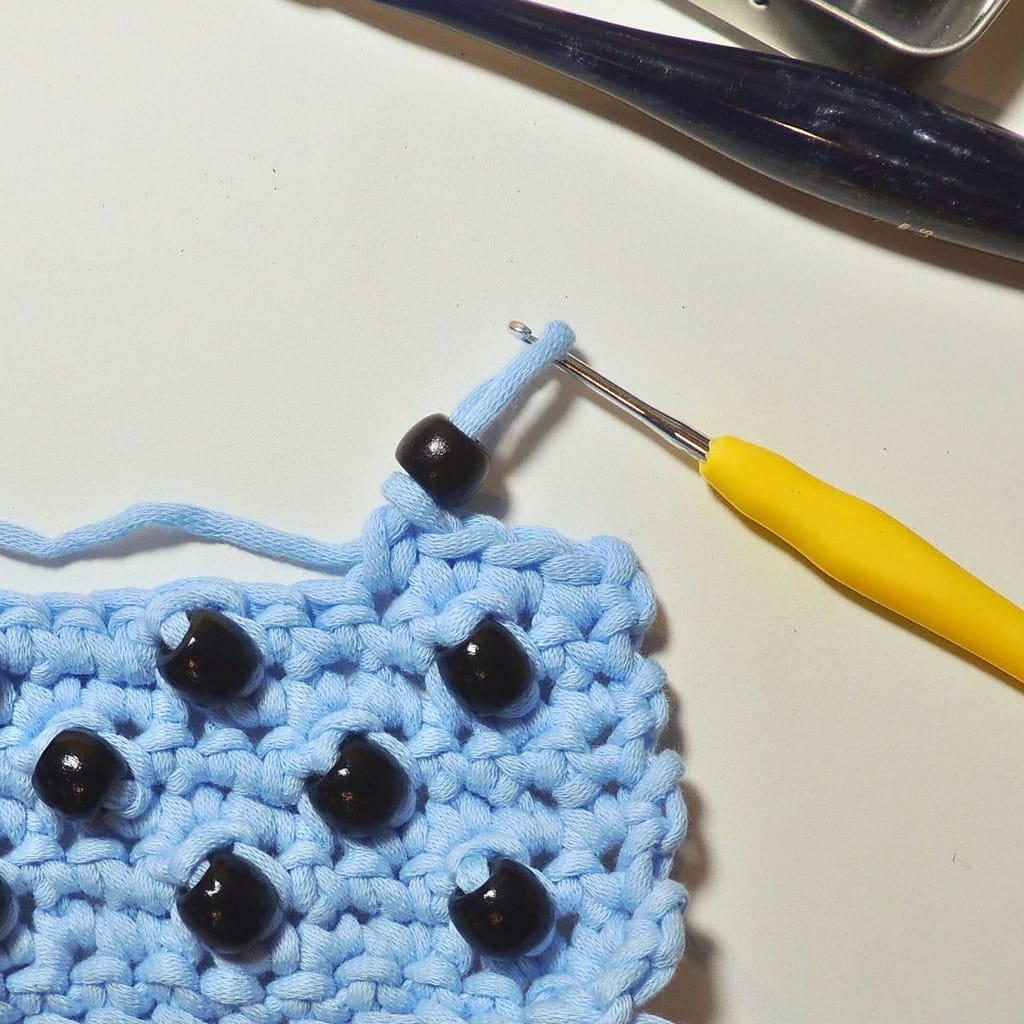
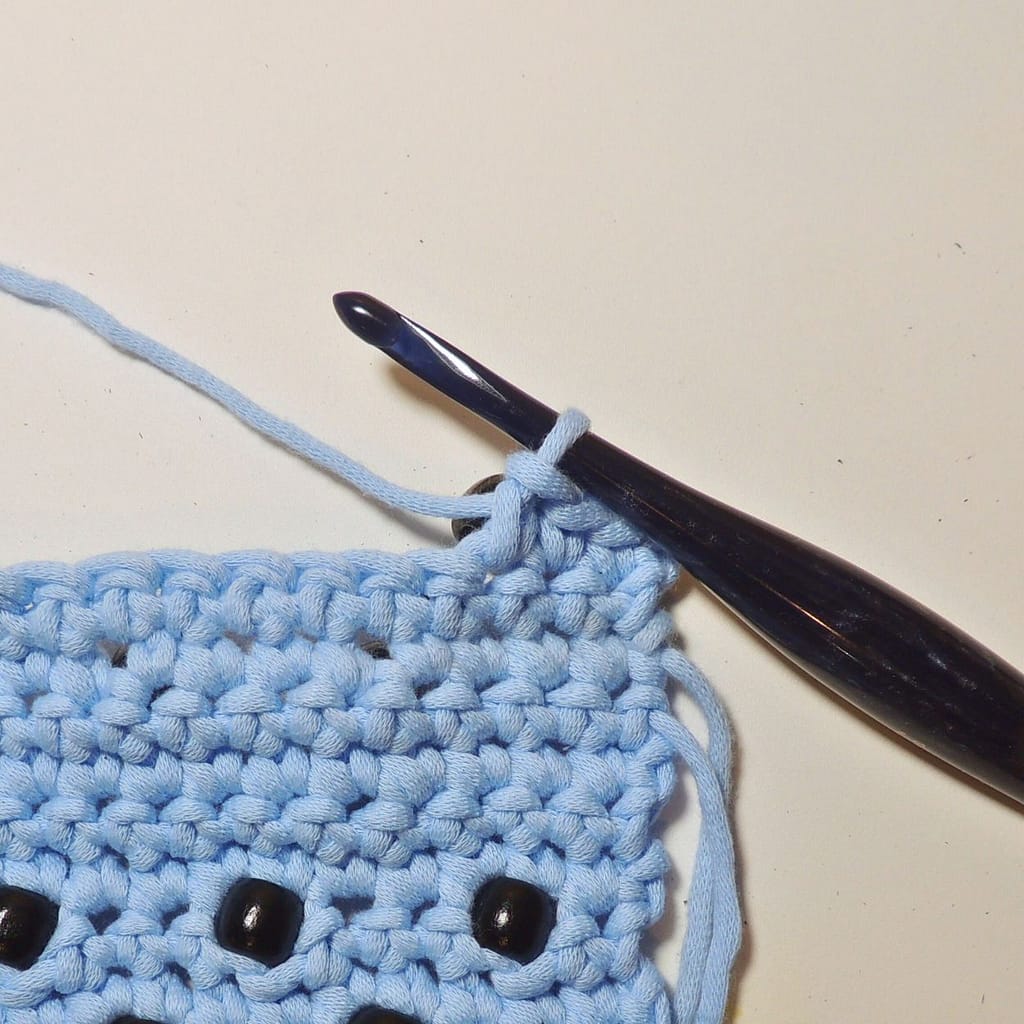
- Put the active loop back onto the regular crochet hook, tighten the loop as needed, and continue crocheting as normal.
- If the bead is large enough to significantly distort the stitch, then make the stitch with the bead one or two sizes smaller than the rest; instead of a sc, make a sl st, instead of a dc, make a hdc or sc, and so on.
Video Tutorial Part 1 – Right-Handed
Video Tutorial Part 1 – Left-Handed
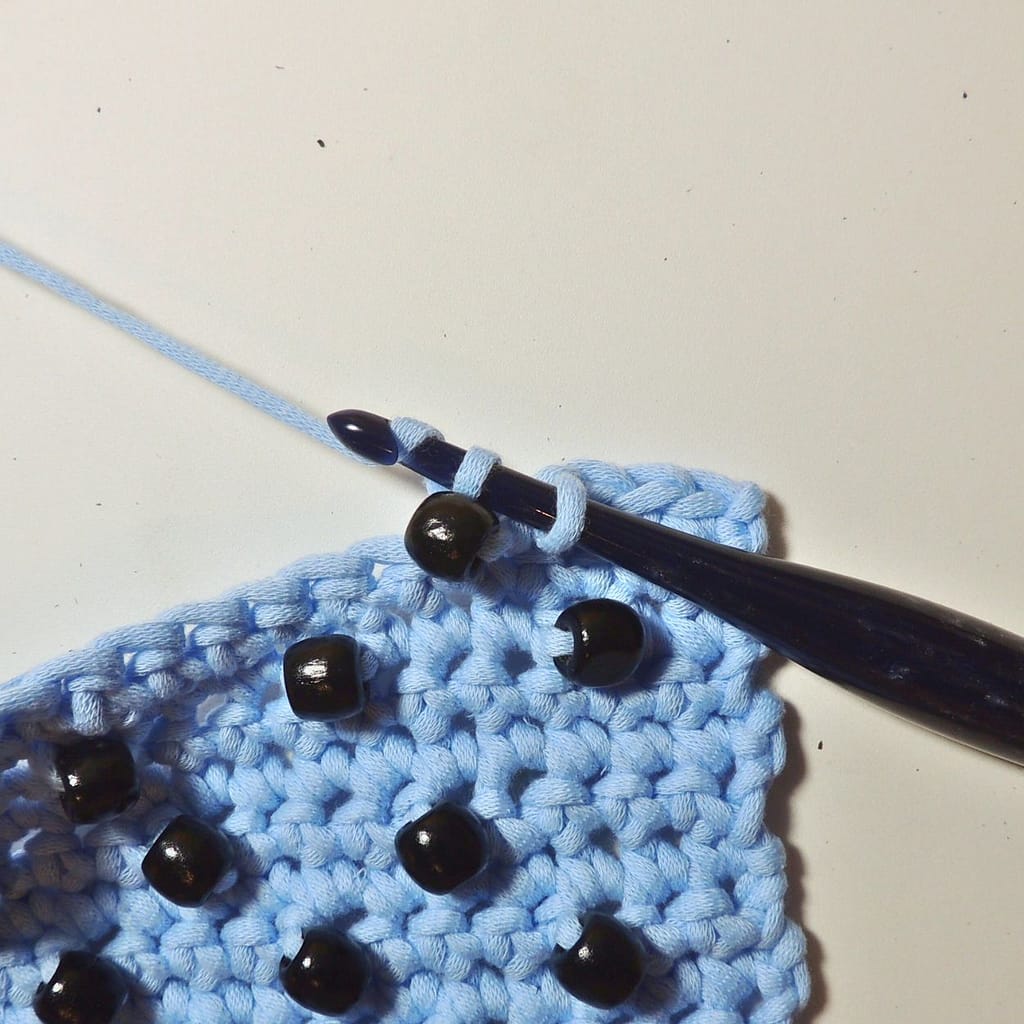
Adding Beads as You Go – Body of Stitch
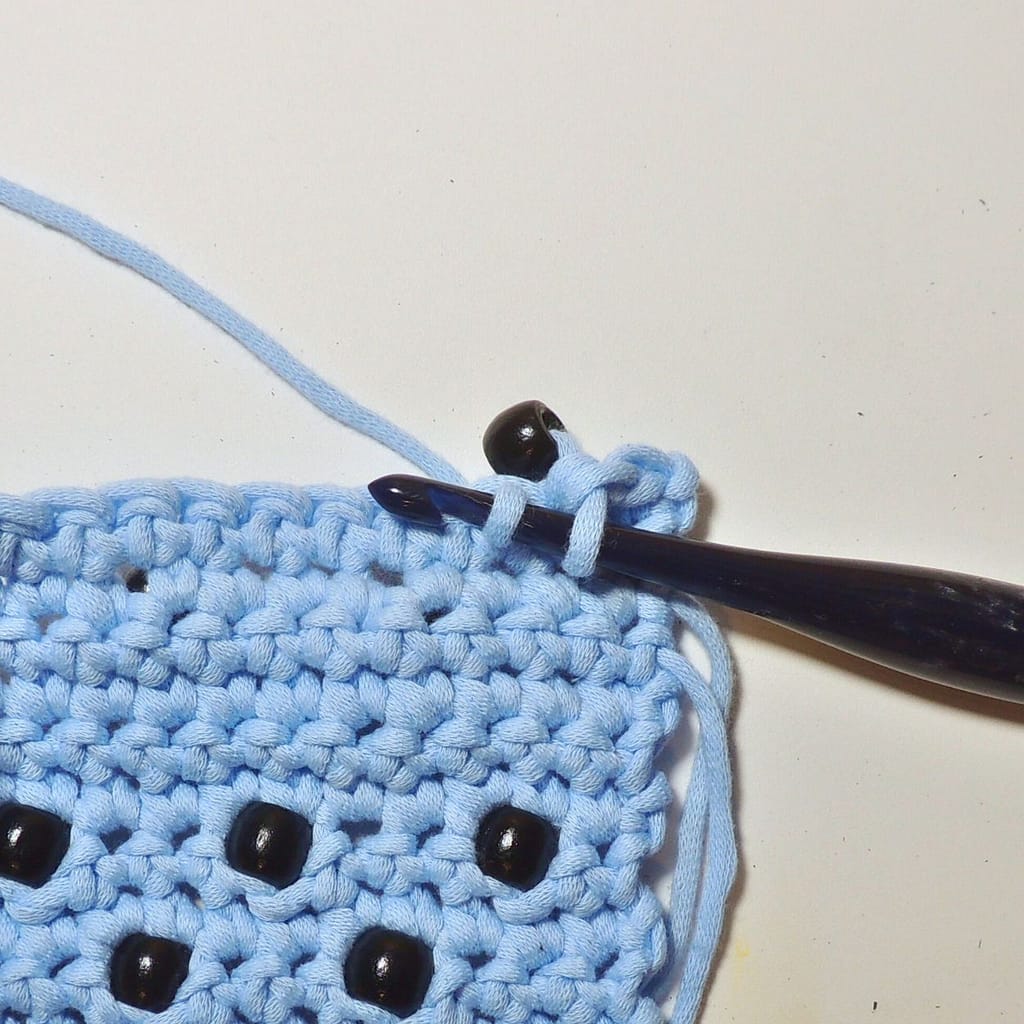
Alternately, the bead can be added to the loop pulled through the stitch being worked into so the bead takes the place of the stitch in the following manner for a large bead in a sc:
- Leave hook on active loop of last st made.
- Pick up a bead with a smaller hook – one that will fit through the hole of the bead with a little extra room – and slide the bead to the hook neck.
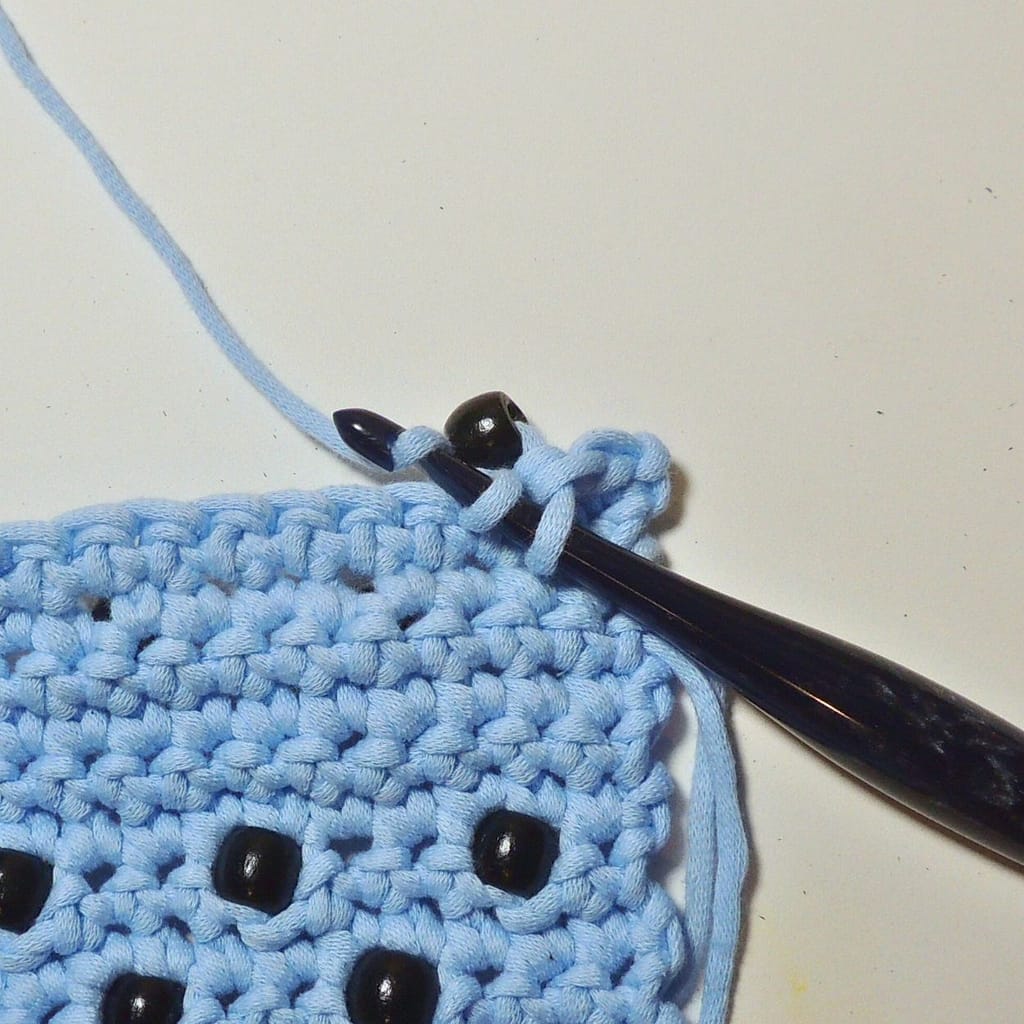
- Insert the bead hook in the next st, yo, pull loop through st and through bead.
- Slip loop off bead hook and onto regular hook, pulling it through loop already on regular hook.
- This will essentially make a sl st with a bead on it, so the bead is taking up the space of the st. Depending on the size of the bead, this can take the place of a sc or hdc.
Ways to alter this method for beads that are smaller, or stitches that are larger, are explained in Part 2 of the video tutorial.
Video Tutorial Part 2 – Right-Handed
Video Tutorial Part 2 – Left-Handed
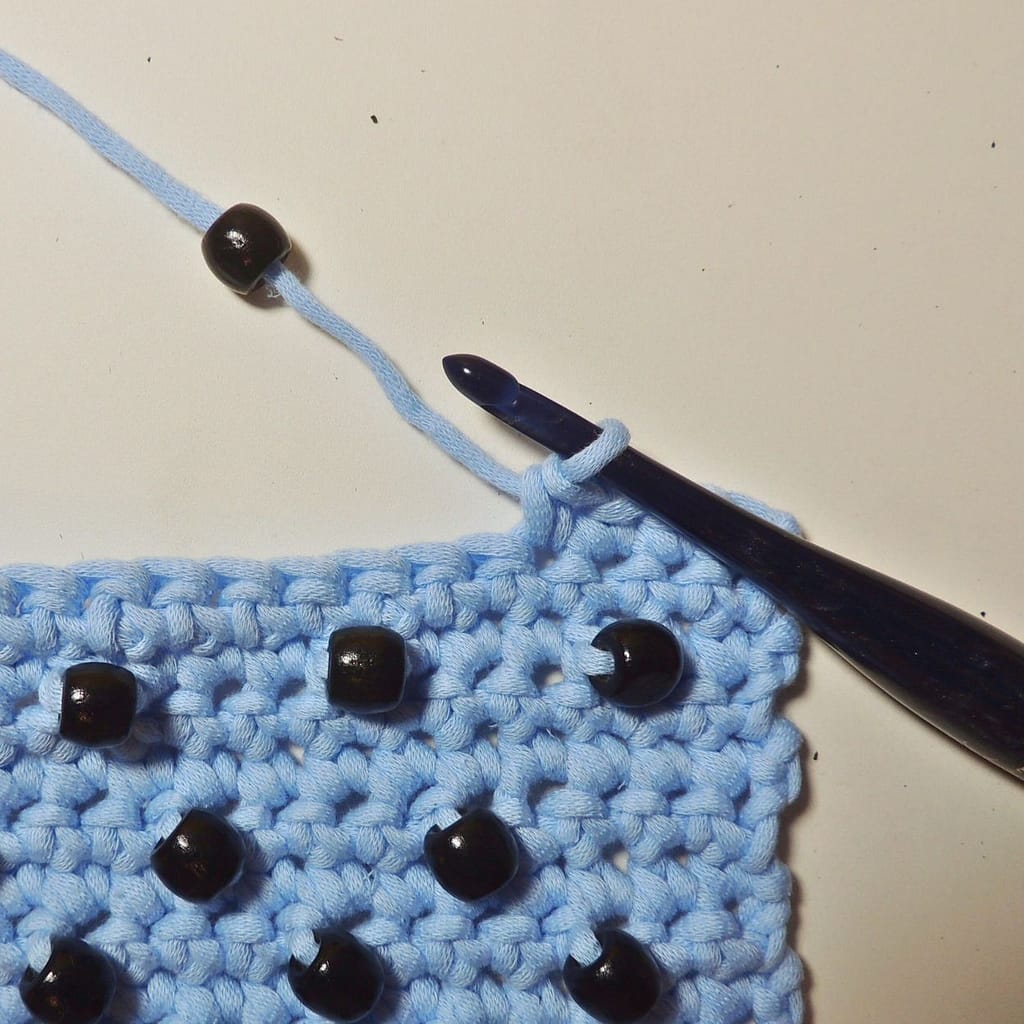
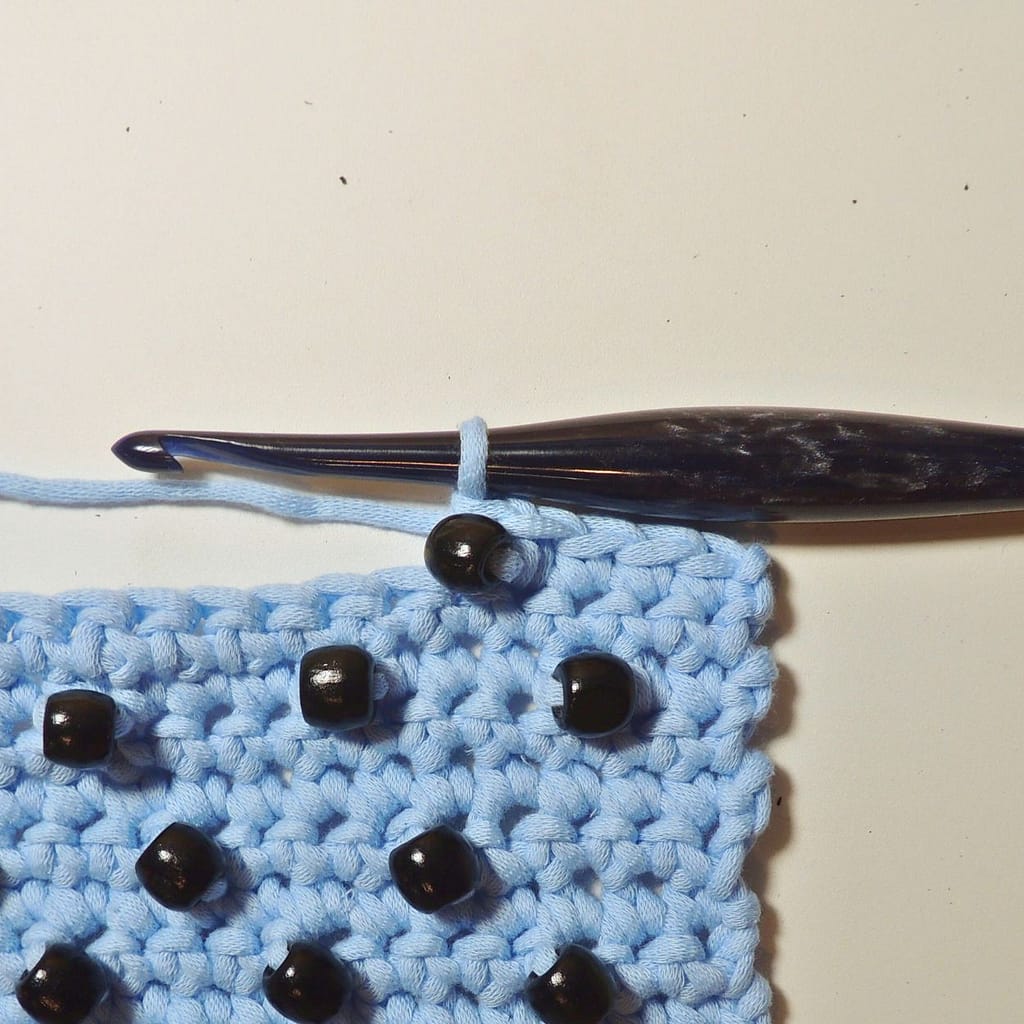
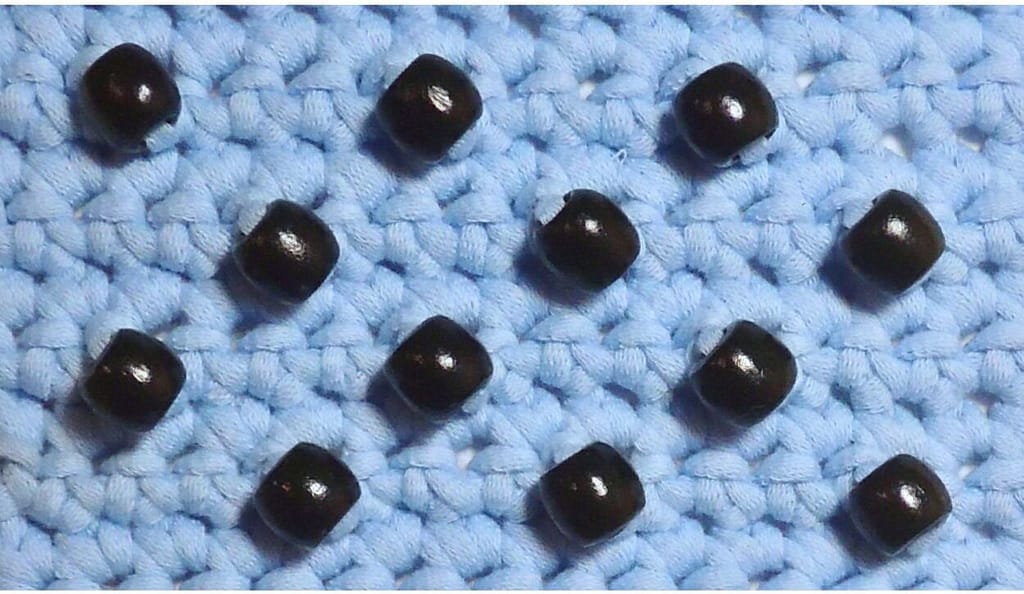
Pre-Stringing Beads
Pre-stringing beads means you can get all the beads on the yarn right away, and don’t have to stop and keep adding them. It also means you have to constantly slide them along your yarn, so you need to use a yarn that can hold up to the beads being slid across it a lot. It’s great for when you know how many beads you need, as well as when you’re traveling with your work and don’t want to worry about dropping loose beads.
First of all, you will need to find a yarn and bead combo that works well. The beads need to be able to easily slide along the yarn without damaging the yarn.
Next you need to determine how many beads you will need. I like to add 1 more bead for every 10 or 20 needed, just in case. I’d rather end with a few extra beads, then find out I’m short. If you need to add more beads you will either need to cut the yarn, or go to the end of the yarn to add them. Plus, if you have extra beads then you don’t have to fret if you find you need/want to make some alterations as you go.
Methods for pre-stringing beads
- Use a wire bead needle with a loop on one end and a point on the other, or a floss threader often used for braces. Pull at least 6” of yarn through the loop, thread the beads onto the point end of the threader/needle, then slide the beads down and over the yarn.
- Cut about 6” of dental floss and fold it in half. Pull at least 6” of yarn through the loop end, then hold the 2 cut ends of the floss together, thread the beads onto the floss, then slide the beads down and over the yarn.
- Make a point at the end of the yarn by dipping it in glue, Mod Podge, or melted wax, smoothing it into a point, and allowing it to dry. Thread the beads onto your pointy yarn.
Now we crochet! Here’s a few ways to place your pre-strung beads where you want them as you make your stitches.
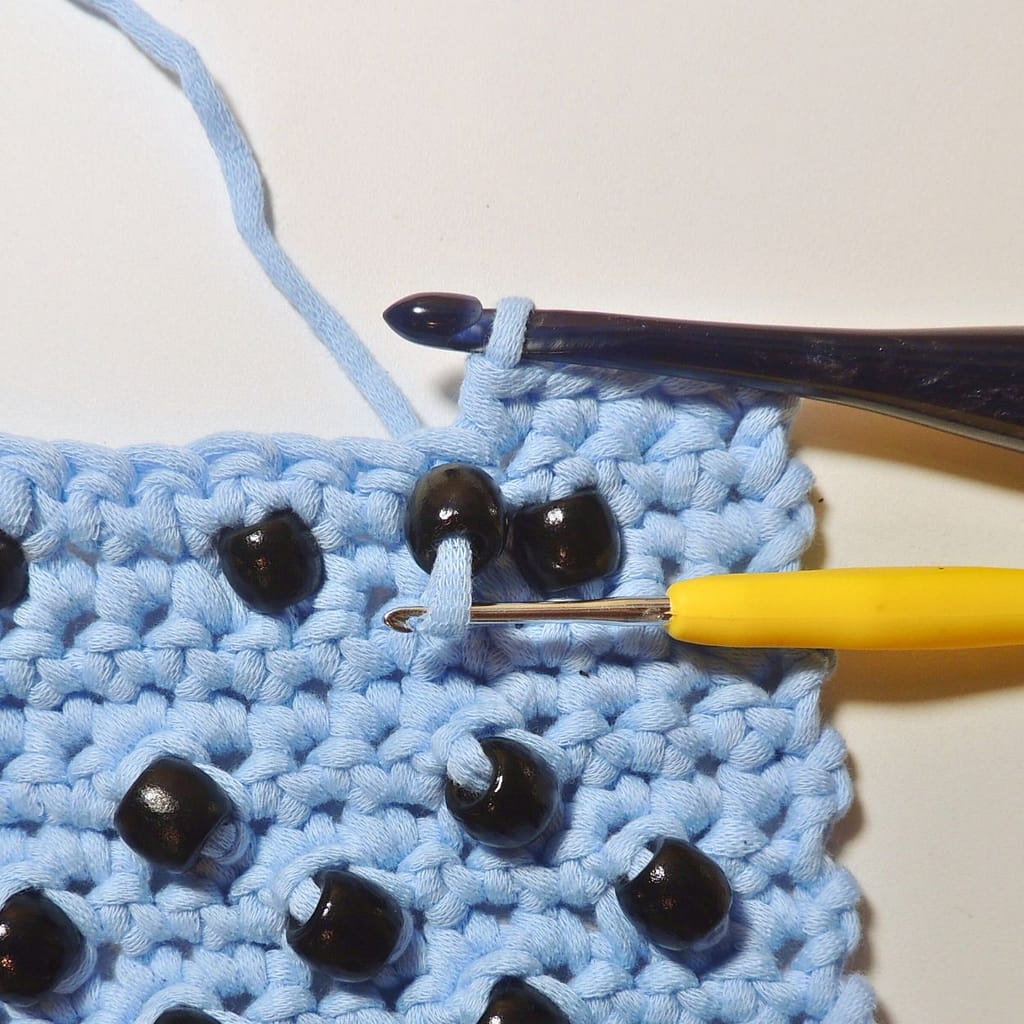
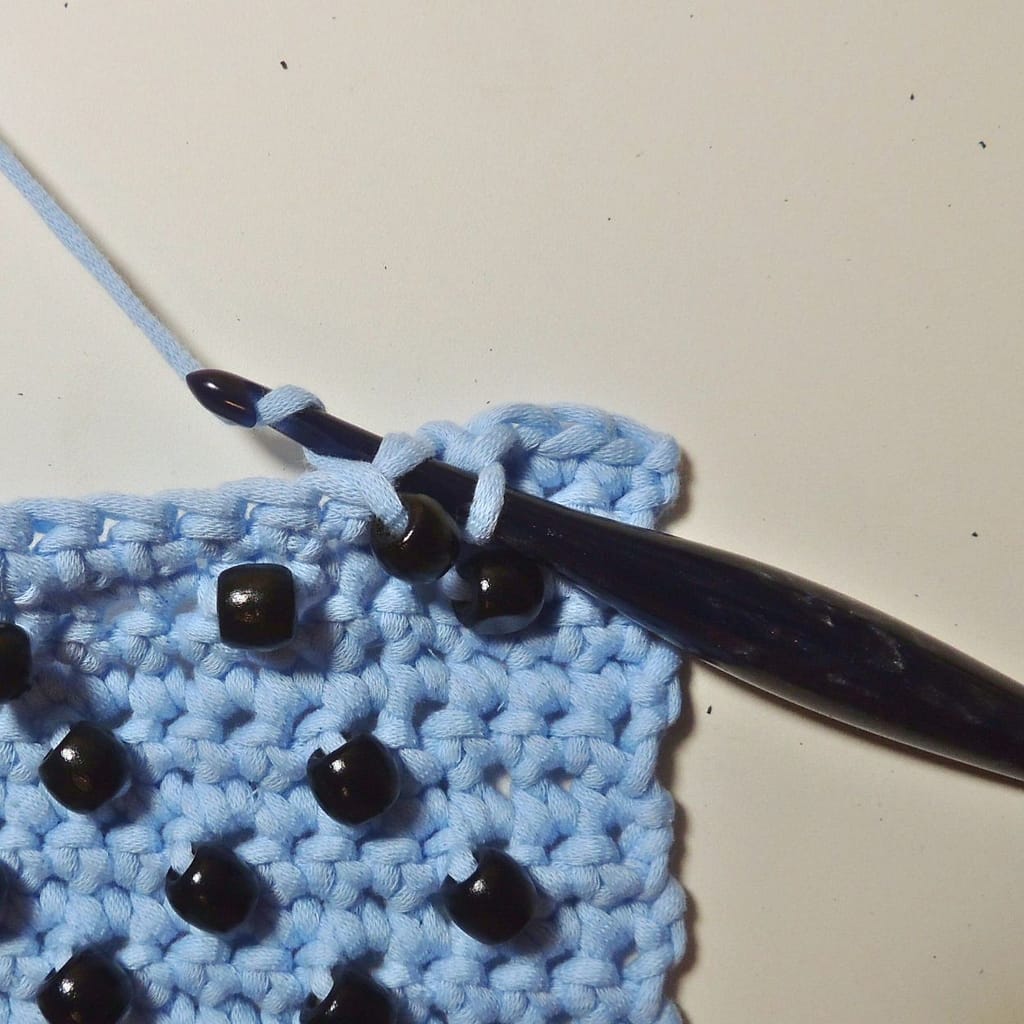
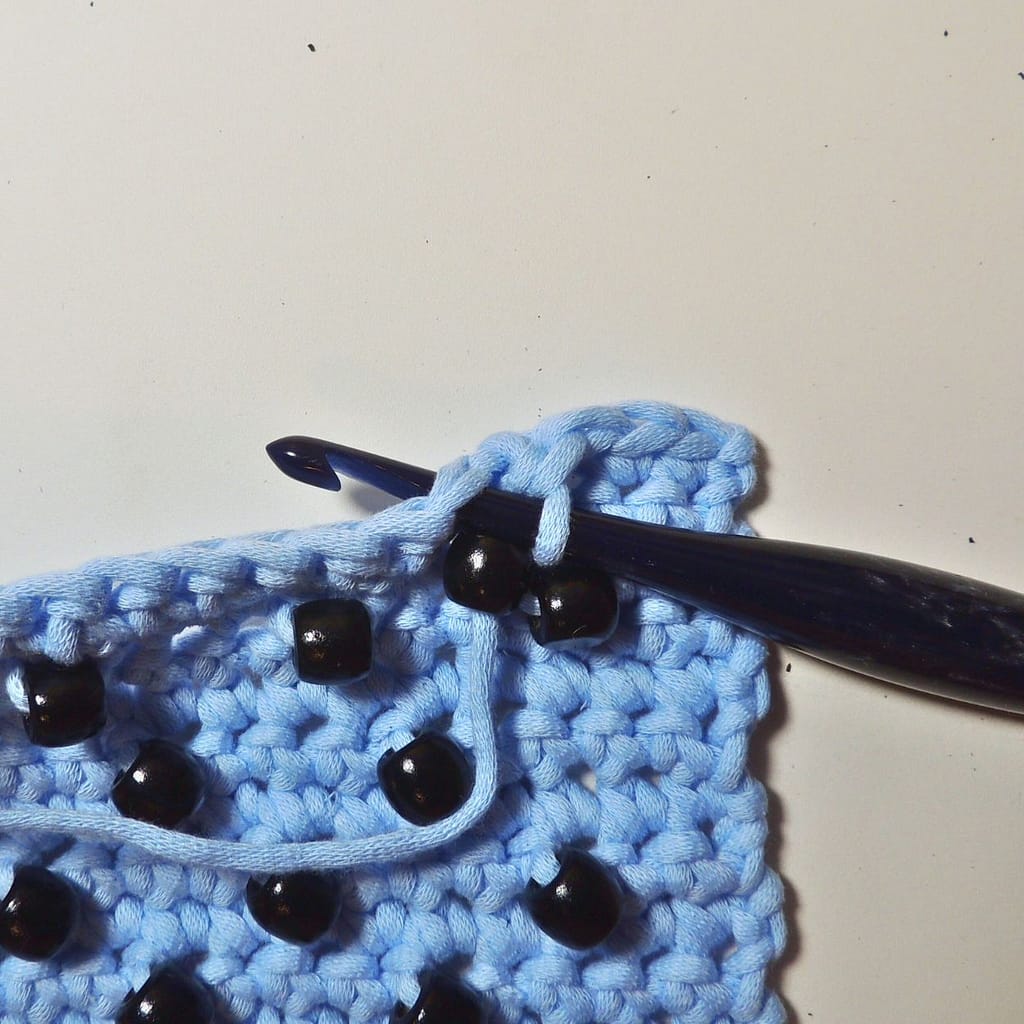
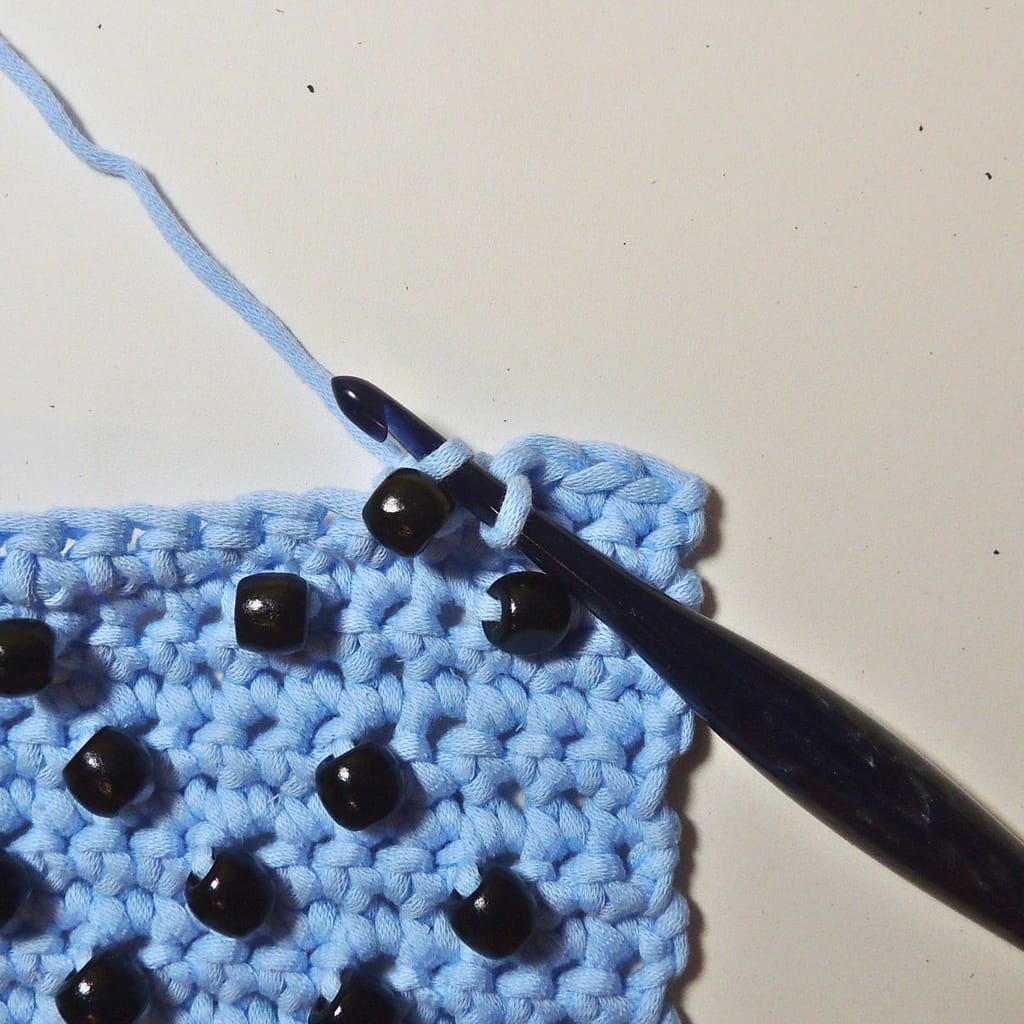
Single Crochet (on the back)
Insert hook into designated stitch, slide bead all the way up, yarn over leaving the bead in back, pull up a loop (2 loops on hook), yarn over, pull through both loops.

Ways to alter this method for other stitches are explained in Part 3 of the video tutorial.
Video Tutorial Part 3 – Right-Handed
Video Tutorial Part 3 – Left-Handed
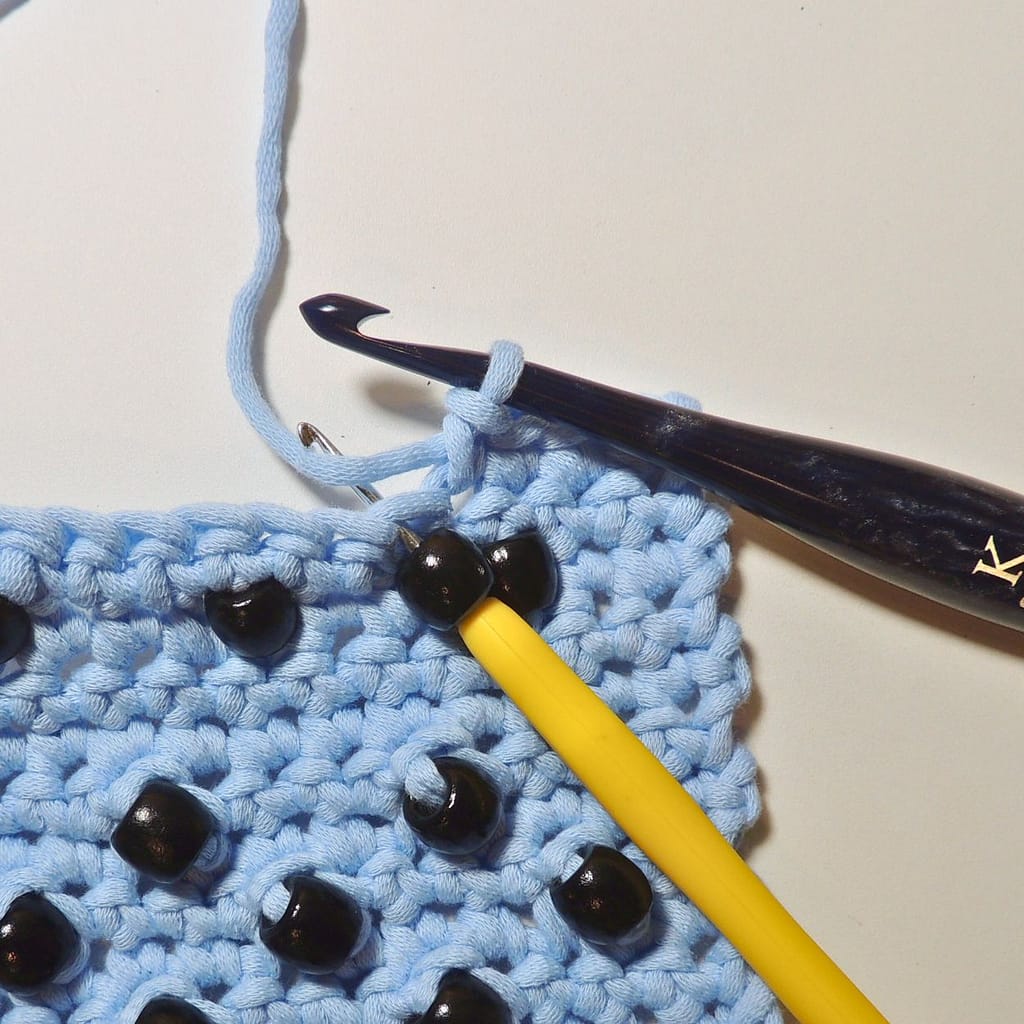
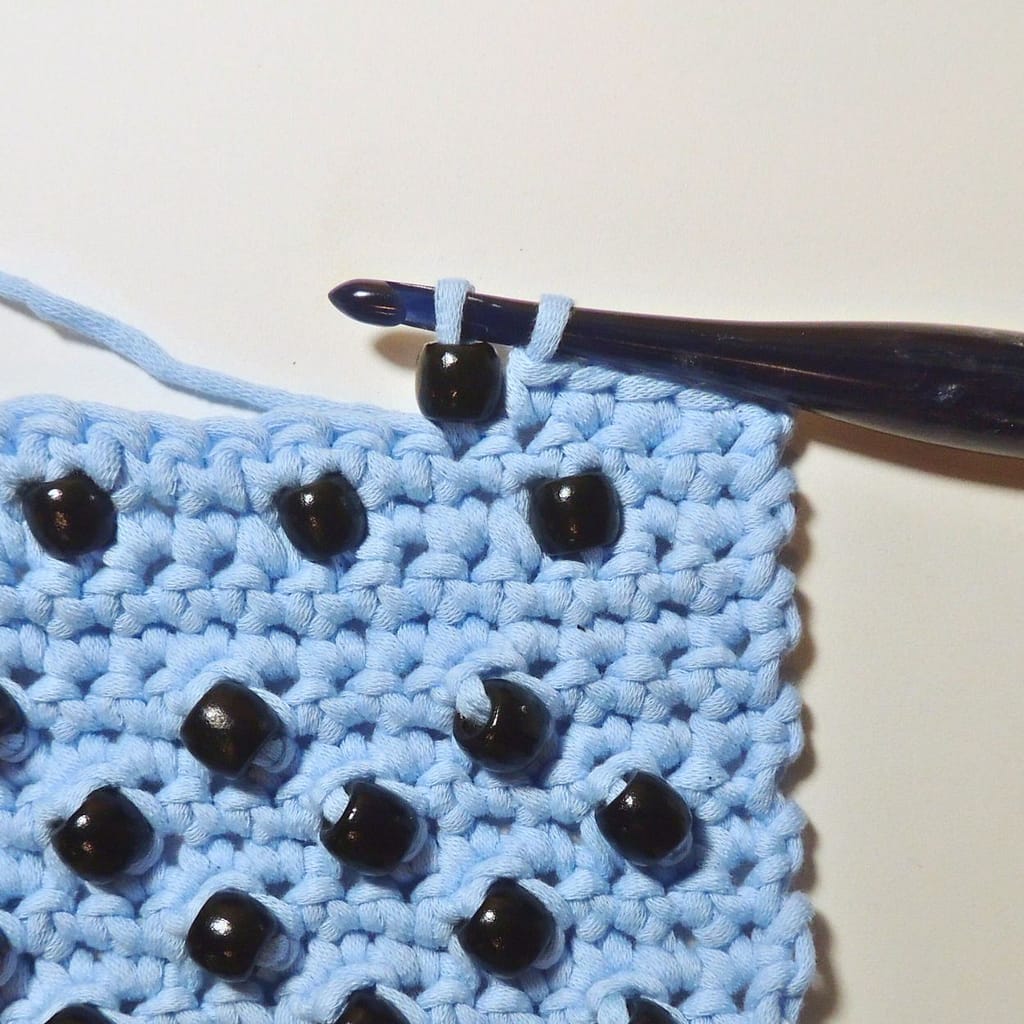
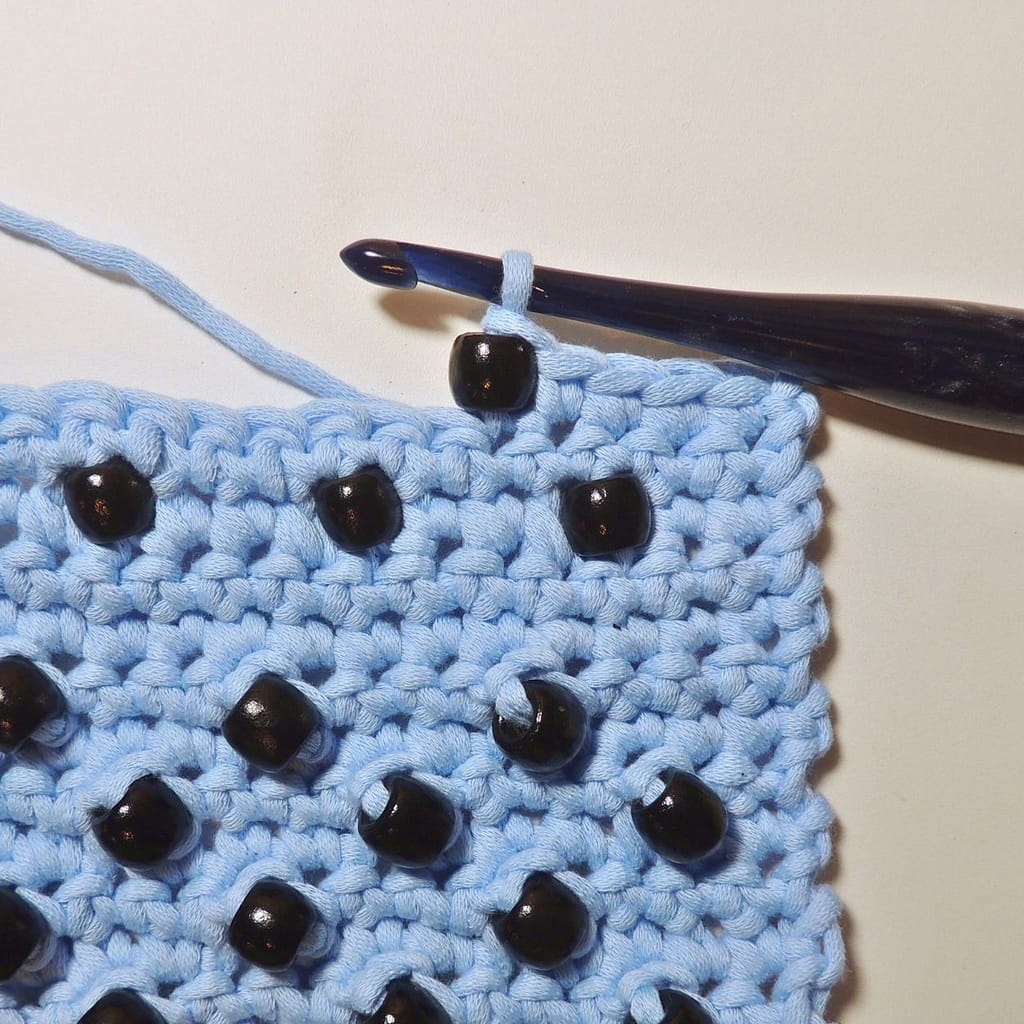
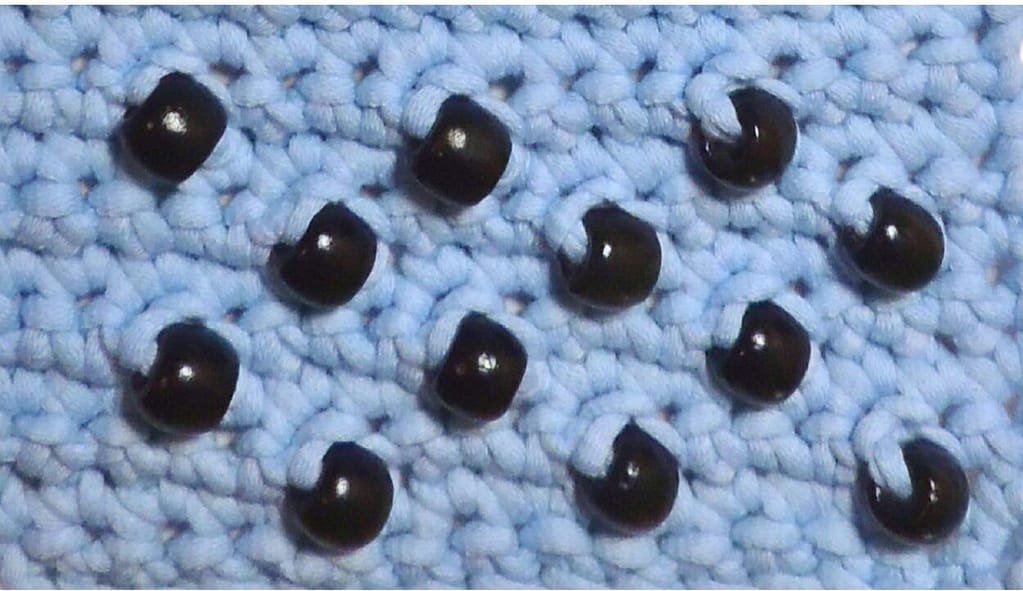
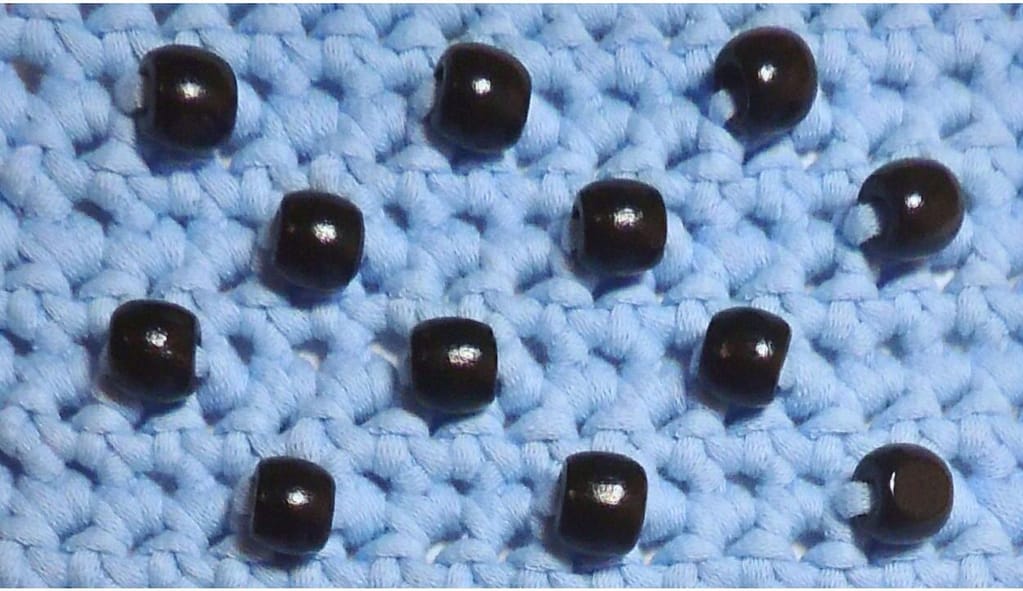
Single Crochet (on the front)
OK, this is actually a modified single crochet, but it’s how you get the bead to sit in front.
Insert hook into designated stitch, slide bead all the way up, wrap the yarn UNDER the hook leaving the bead in front, pull up a loop so that the bead is still under the loop (2 loops on hook), yarn over, pull through both loops.

Ways to alter this method for other stitches are explained in Part 4 of the video tutorial.
Video Tutorial Part 4 – Right-Handed
Video Tutorial Part 4 – Left-Handed
Non-Yarn Pre-Strung Beads
Beads that are strung on thread or string such as what you might buy to wear as a necklace or use as holiday garland are also used with crochet from time to time. This works great for garland or trim or even a fancy little garter. Mardi Gras type beads are common, though you can use higher quality beads as well. You just want to be sure that your string is high enough quality that it won’t break. Beads for crafting are often sold pre-strung for convenience. These beads are not intended to be used with the string they are sold on, so you will need to re-string them on better thread. A knot between each bead, or at least after every 5-10 beads, will make it so if your string does break, you don’t lose all your beads.
With pre-strung beads, the most common method is to crochet around the string in between the beads, usually on stitch after each bead, then a chain or two to go over the top of the bead, and repeat.

Afterthought Beads
Afterthought beads are not crocheted into your work, they are sewn on after the crochet is completed. The beads are sewn on with bead thread, quilting thread, or other strong hand sewing thread. There are countless ways to do this, such placing them at specific intervals throughout a project, adding them on sporadically, making a decorative area with them, or even using them to finish an applique. You can also use pre-strung beads as afterthought beading.
Video Tutorial Part 5 – Right-Handed
Video Tutorial Part 5 – Left-Handed
Try it out!
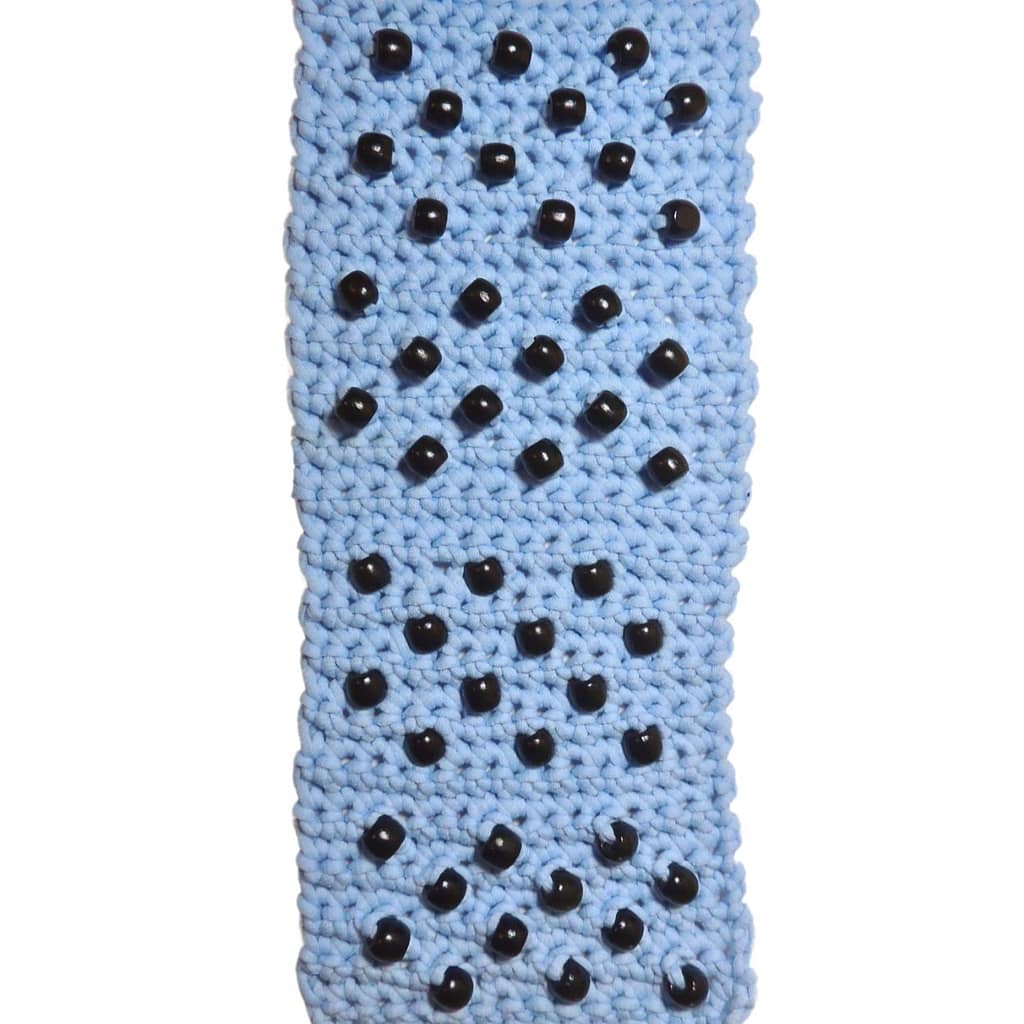
Here’s the pattern for the sampler made to go with this tutorial. Try it using size 4 (worsted weight) yarn and pony beads found in the kids craft section of most craft stores and even some department or grocery stores with craft section.
Yarn
Size 4 (worsted weight) yarn – any that is not novelty or fuzzy yarn
Hook
US H/8 (5.0 mm) crochet hook
2.5 mm crochet hook for adding beads
Notions
- Bead Needle or Dental Floss
- Pony Beads
Abbreviations
NOTE The written instructions and video tutorials for bead stitches are in the article above.
bstt: bead stitch top of stitch (Part 1)
bstb: bead stitch body of stitch (Part 2)
bstw: bead stitch wrong side of stitch (Part 3)
bstr: bead stitch right side of stitch (Part 4)
Notes
- 24 pre-strung beads will be needed for Parts 3 & 4; 12 beads for each part. Either pre-string them before starting sampler, or cut yarn after Part 2, pre-string the beads, and then re-connect the yarn for Part 3.
Sampler Pattern
Part 1 – adding beads as you go: top of stitch
Row 1 (rs): Ch 16, sc in 2nd ch from hook and each rem ch. (15 sts)
Row 2 (ws): Ch 1, turn, sc in first st and each st across.
Row 3: Ch 1, turn, sc in first 4 sts, [bstt in next st, sc in next 3 sts] 2 times, bstt in next st, sc in last 2 sts.
Row 4: Rep Row 2.
Row 5: Ch 1, turn, sc in first 2 sts, [bstt in next st, sc in next 3 sts] 2 times, bstt in next st, sc in last 4 sts.
Row 6: Rep Row 2.
Rows 7-10: Rep Rows 3-6.
Rows 11-12: Rep Row 2.
Part 2 – adding beads as you go: body of stitch
Row 1 (rs): Ch 1, turn, sc in first 4 sts, [bstb in next st, sc in next 3 sts] 2 times, bstb in next st, sc in last 2 sts.
Row 2 (ws): Ch 1, turn, sc in first st and each st across.
Row 3: Ch 1, turn, sc in first 2 sts, [bstb in next st, sc in next 3 sts] 2 times, bstb in next st, sc in last 4 sts.
Row 4: Rep Row 2.
Rows 5-8: Rep Rows 1-4.
Rows 9-10: Rep Row 2.
Part 3 – adding pre-strung beads to the wrong side of stitch
Row 1 (rs): Ch 1, turn, sc in first st and each st across.
Row 2 (ws): Ch 1, turn, sc in first 2 sts, [bstw in next st, sc in next 3 sts] 2 times, bstw in next st, sc in last 4 sts.
Row 3: Rep Row 1.
Row 4: Ch 1, turn, sc in first 4 sts, [bstw in next st, sc in next 3 sts] 2 times, bstw in next st, sc in last 2 sts.
Rows 5-8: Rep Rows 1-4.
Rows 9-12: Rep Row 1.
Part 4 – adding pre-strung beads to the right side of stitch
Row 1 (rs): Ch 1, turn, sc in first 4 sts, [bstr in next st, sc in next 3 sts] 2 times, bstr in next st, sc in last 2 sts.
Row 2 (ws): Ch 1, turn, sc in first st and each st across.
Row 3: Ch 1, turn, sc in first 2 sts, [bstr in next st, sc in next 3 sts] 2 times, bstr in next st, sc in last 4 sts.
Row 4: Rep Row 2.
Rows 5-8: Rep Rows 1-4.
Rows 9-10: Rep Row 2.
Fasten off.